
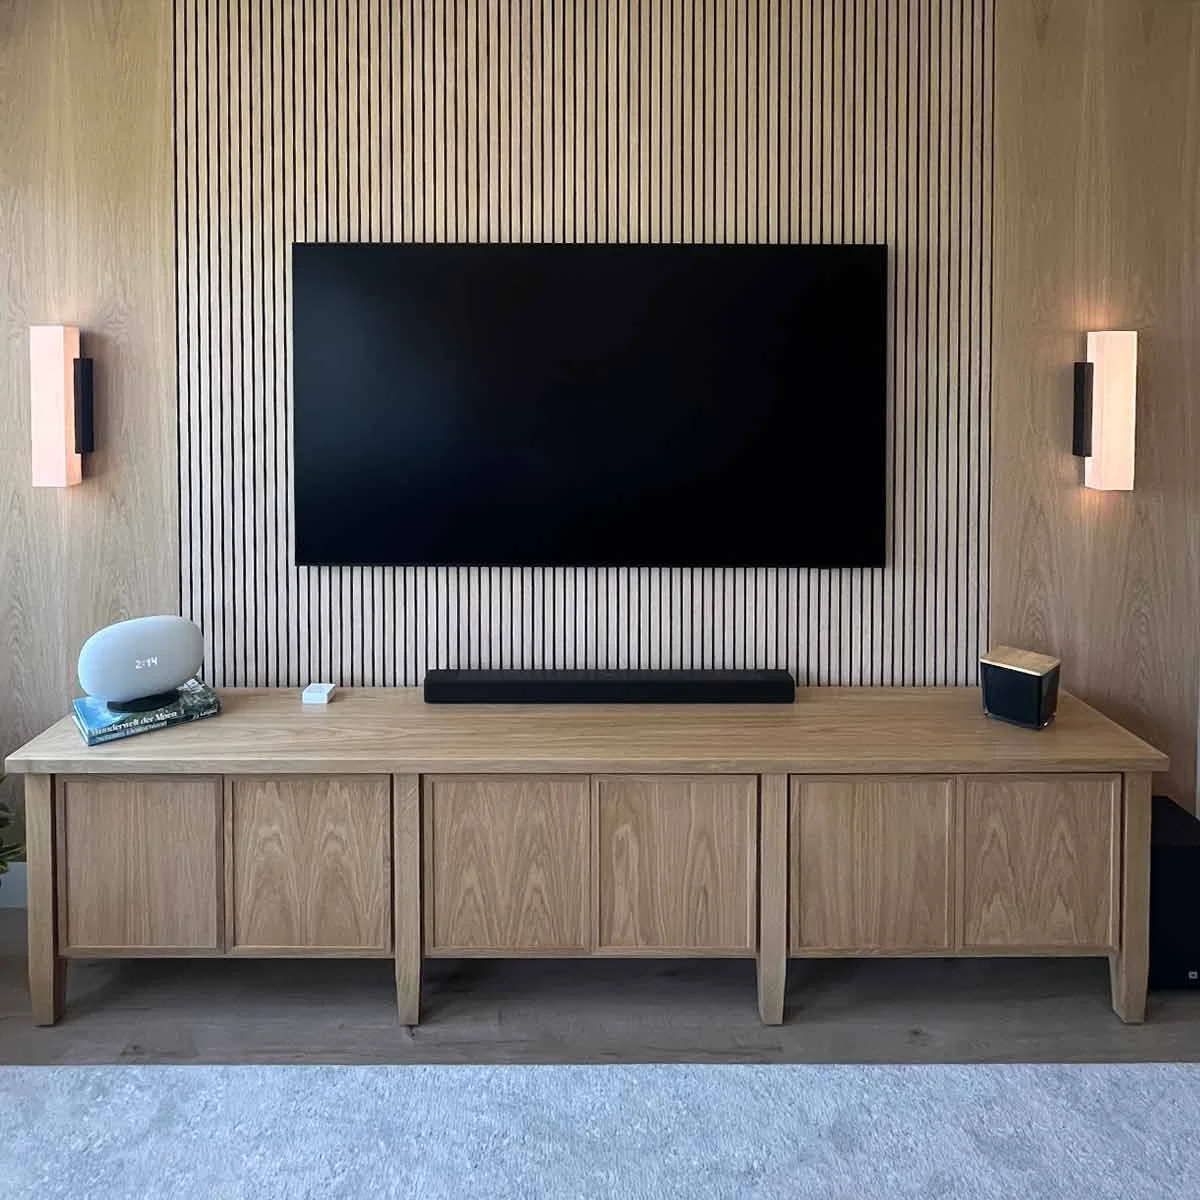
Sound Slats and a Built-In Media Wall: A Bonus Room Transformation
An empty bonus room becomes a cozy entertainment space with a custom media wall, sound-absorbing slats, and built-in storage. See the full transformation.
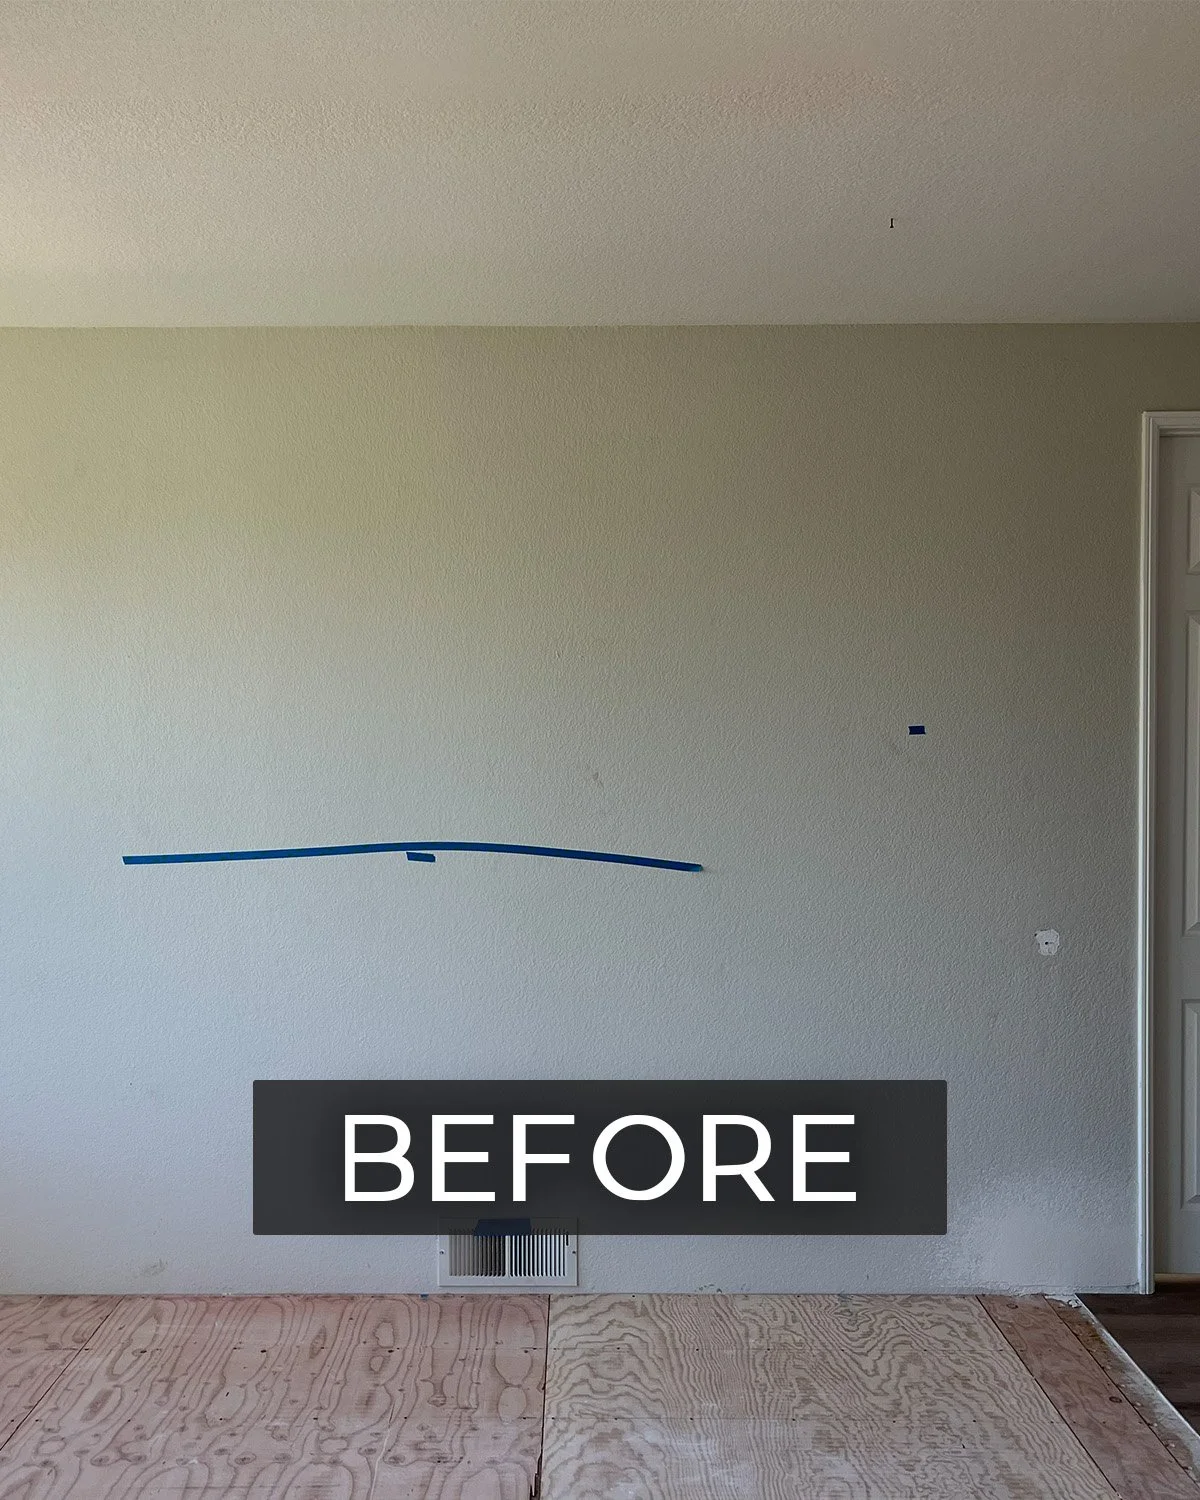
Some rooms just need the right vision to come together. This bonus room started as a blank slate, an empty loft space with no furniture and no clear direction, and it's now a favorite spot to unwind and watch a movie.
Getting the Design Just Right
The room belonged to Kelly and Dan’s sister-in-law, and the goal was simple: turn an empty space into a cozy, functional entertainment hub. What made this project interesting is how much thought went into getting every detail right, even without Kelly walking through the room in person.
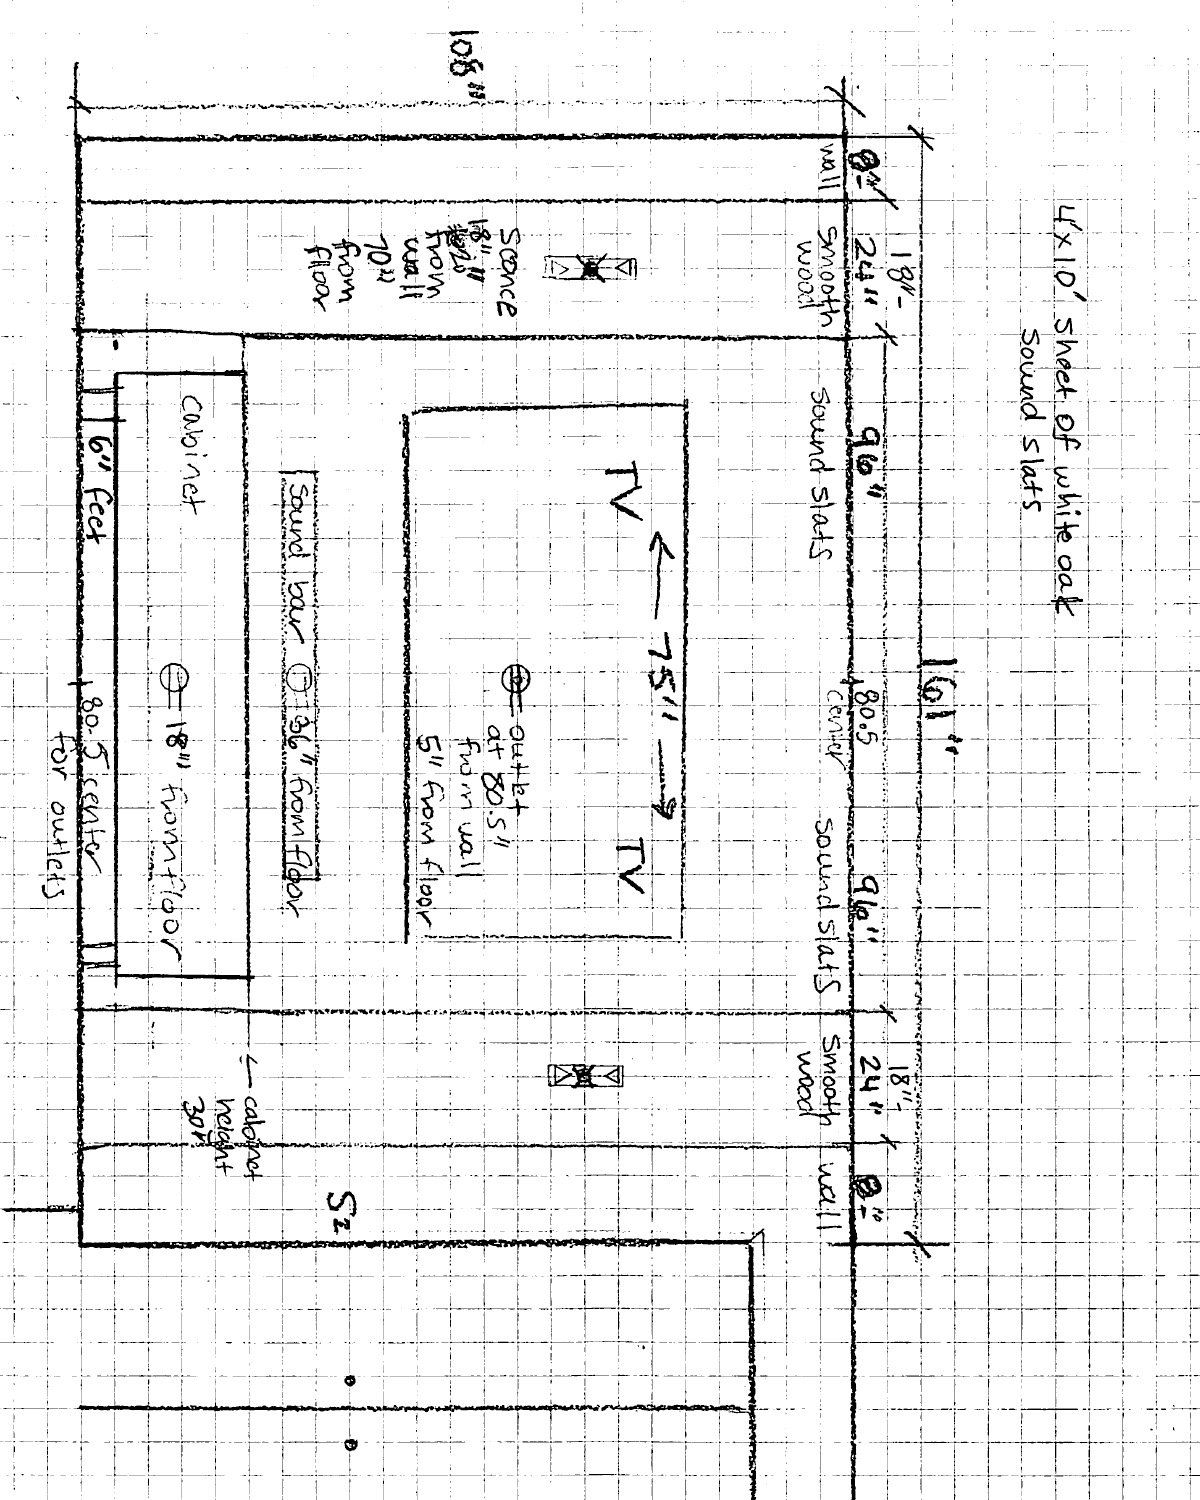
Working from photos and measurements, Kelly sketched the wall design by hand on graph paper, working through proportions, panel placement, and cabinet dimensions until the layout felt right. It's the kind of care that goes into every Sierra Homes design: taking the time to understand the space and the client's vision, then translating that into something that actually fits, down to the inch.
Once the design was approved, a local contractor brought it to life exactly as planned.
The Details That Make It Work
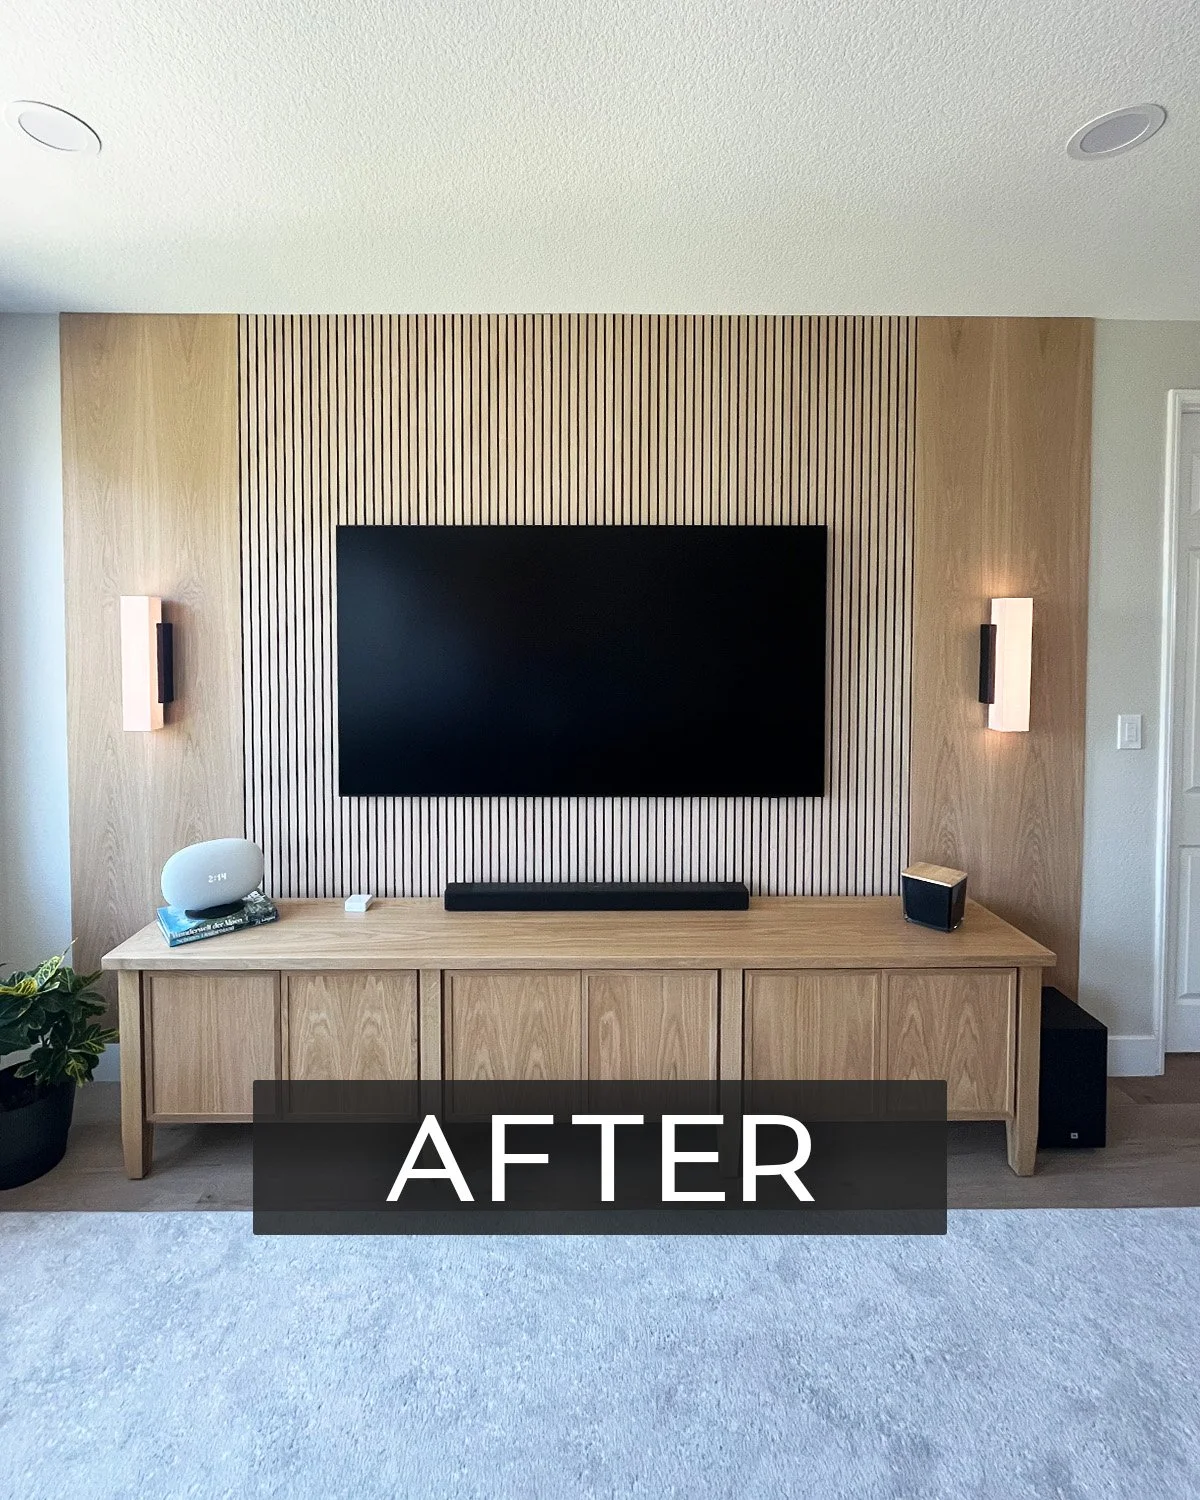
The finished media wall combines style and function in a few key ways:
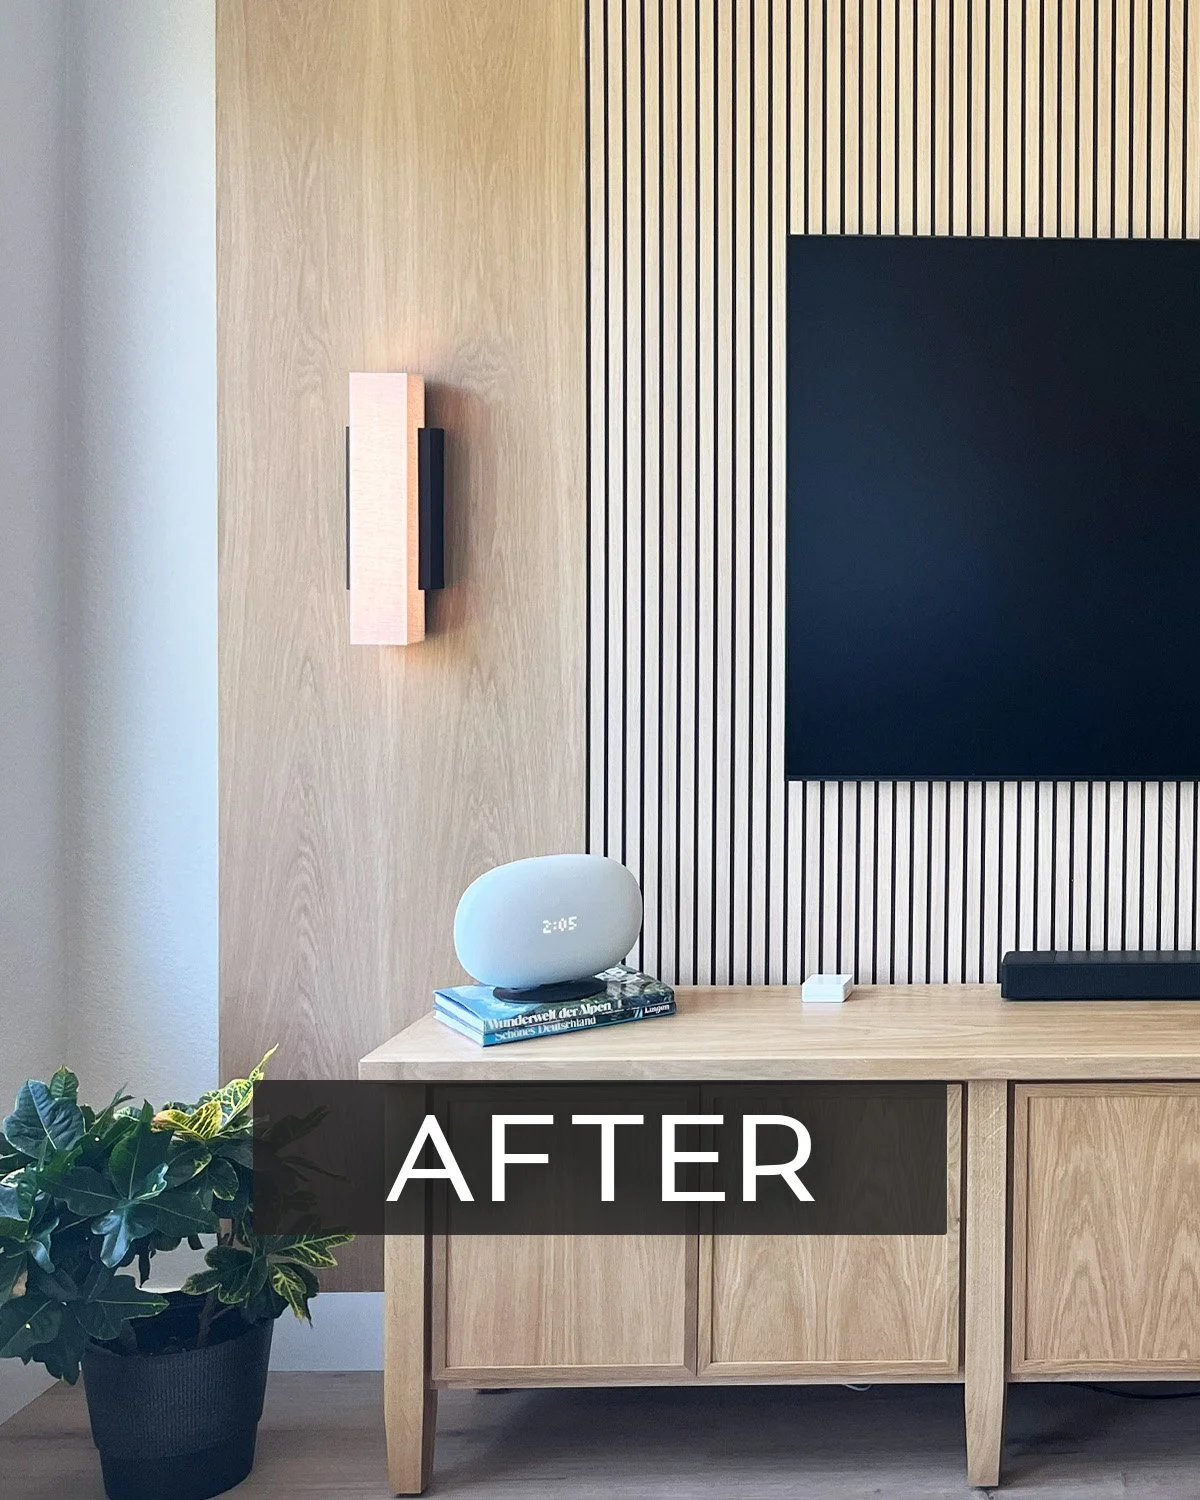
A sleek TV wall panel finished in white oak
Sound-absorbing slats built into the design, so movie nights don't echo through the house
Elegant sconce lighting on either side for warmth after dark
A storage cabinet below, keeping media components and clutter out of sight
The Result
What started as an empty loft is now a space built for actually using: movie nights, hosting friends, settling in after a long day. It's a good example of what Kelly and the Sierra Homes team bring to every project, whether it's a full custom build or a single-room refresh: thoughtful design that fits the client and the space, right down to the last detail.
Looking for inspiration for your own space?
A Designer's Own Remodel: Starting With the Girls' Bathrooms
Even designers put off their own projects. Take a look behind the scenes as Kelly finally starts remodeling her own home, beginning with the girls' bathroom.
Kelly spends her days helping other people fall back in love with their homes. Her own house, somehow, always ended up at the bottom of the list. That's finally changing, and we're pulling back the curtain as it happens.
The Question Behind the Project
The house is 14 years old, and it's held up well. It's also seen a lot of life: three kids, three dogs, and a lot of years of upstairs carpet taking the brunt of it. The bigger question wasn't really about carpet or tile, though. It was whether to stay in the house long term or start preparing it to sell down the road, and if they're staying, what actually adds value versus what's just a want.
Even after 20-plus years of guiding clients through exactly this kind of decision, working through it for their own home took real thought around scope, budget, and what to tackle first. That's the process we're walking through here.
Why Start With the Bathrooms
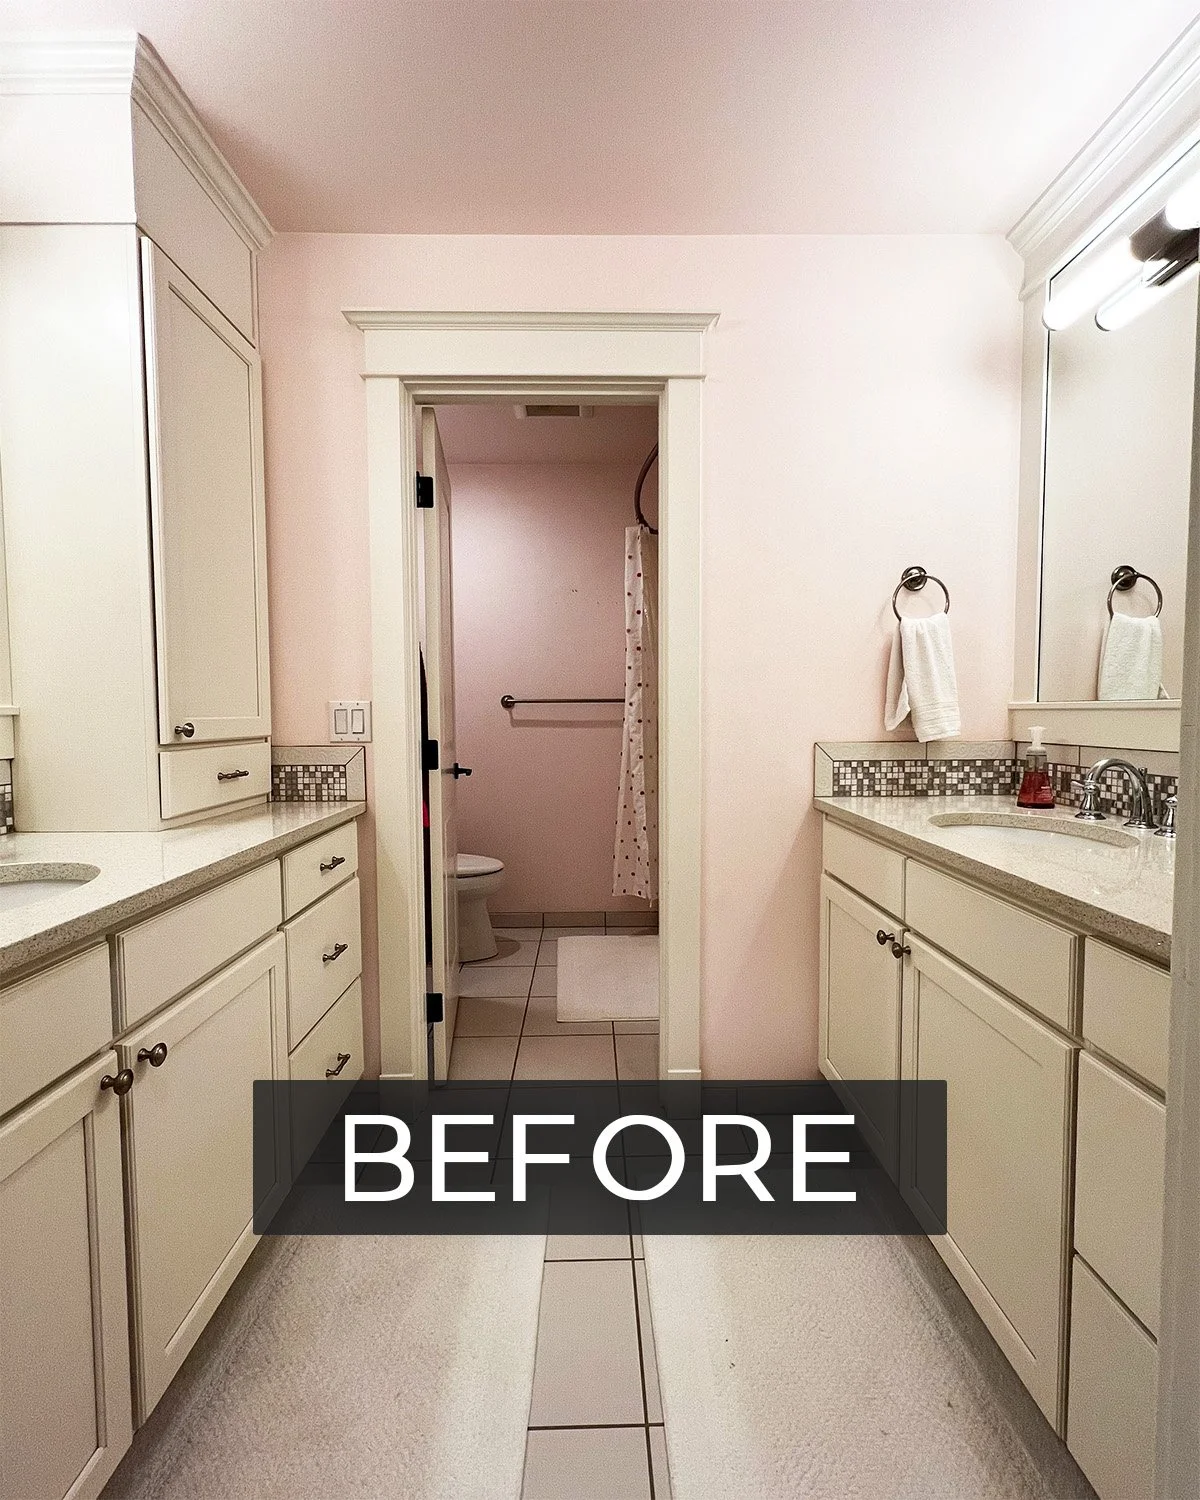
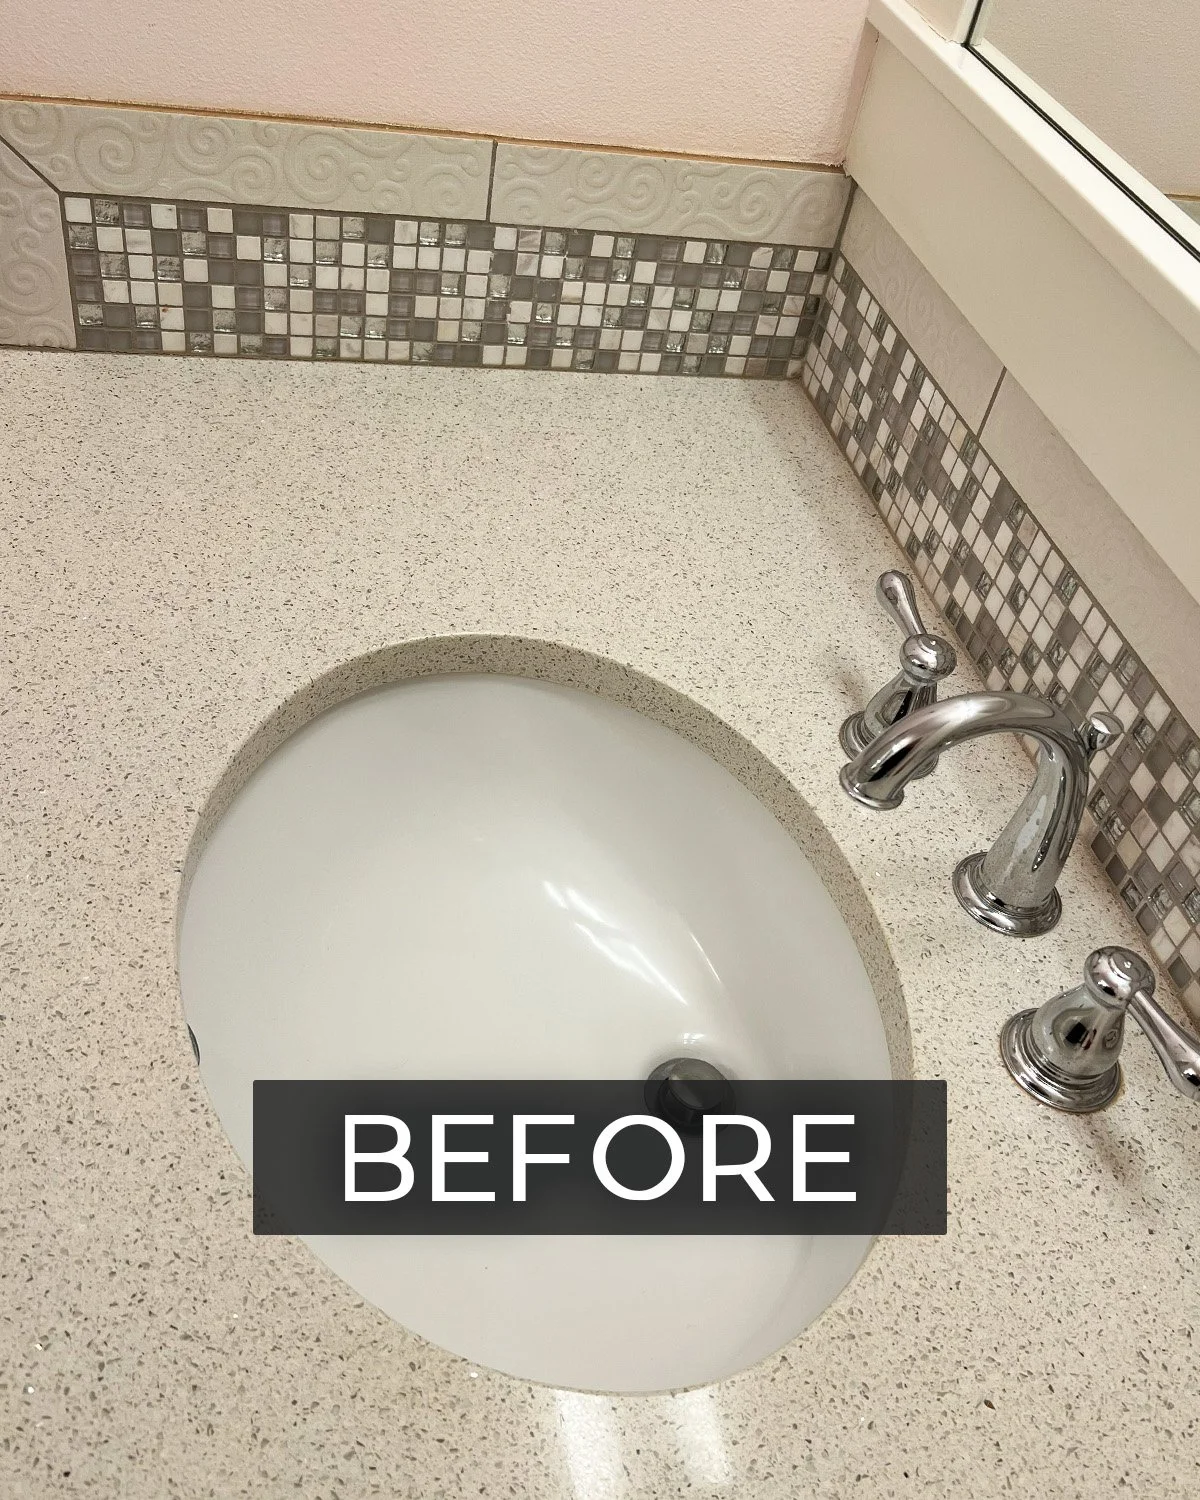
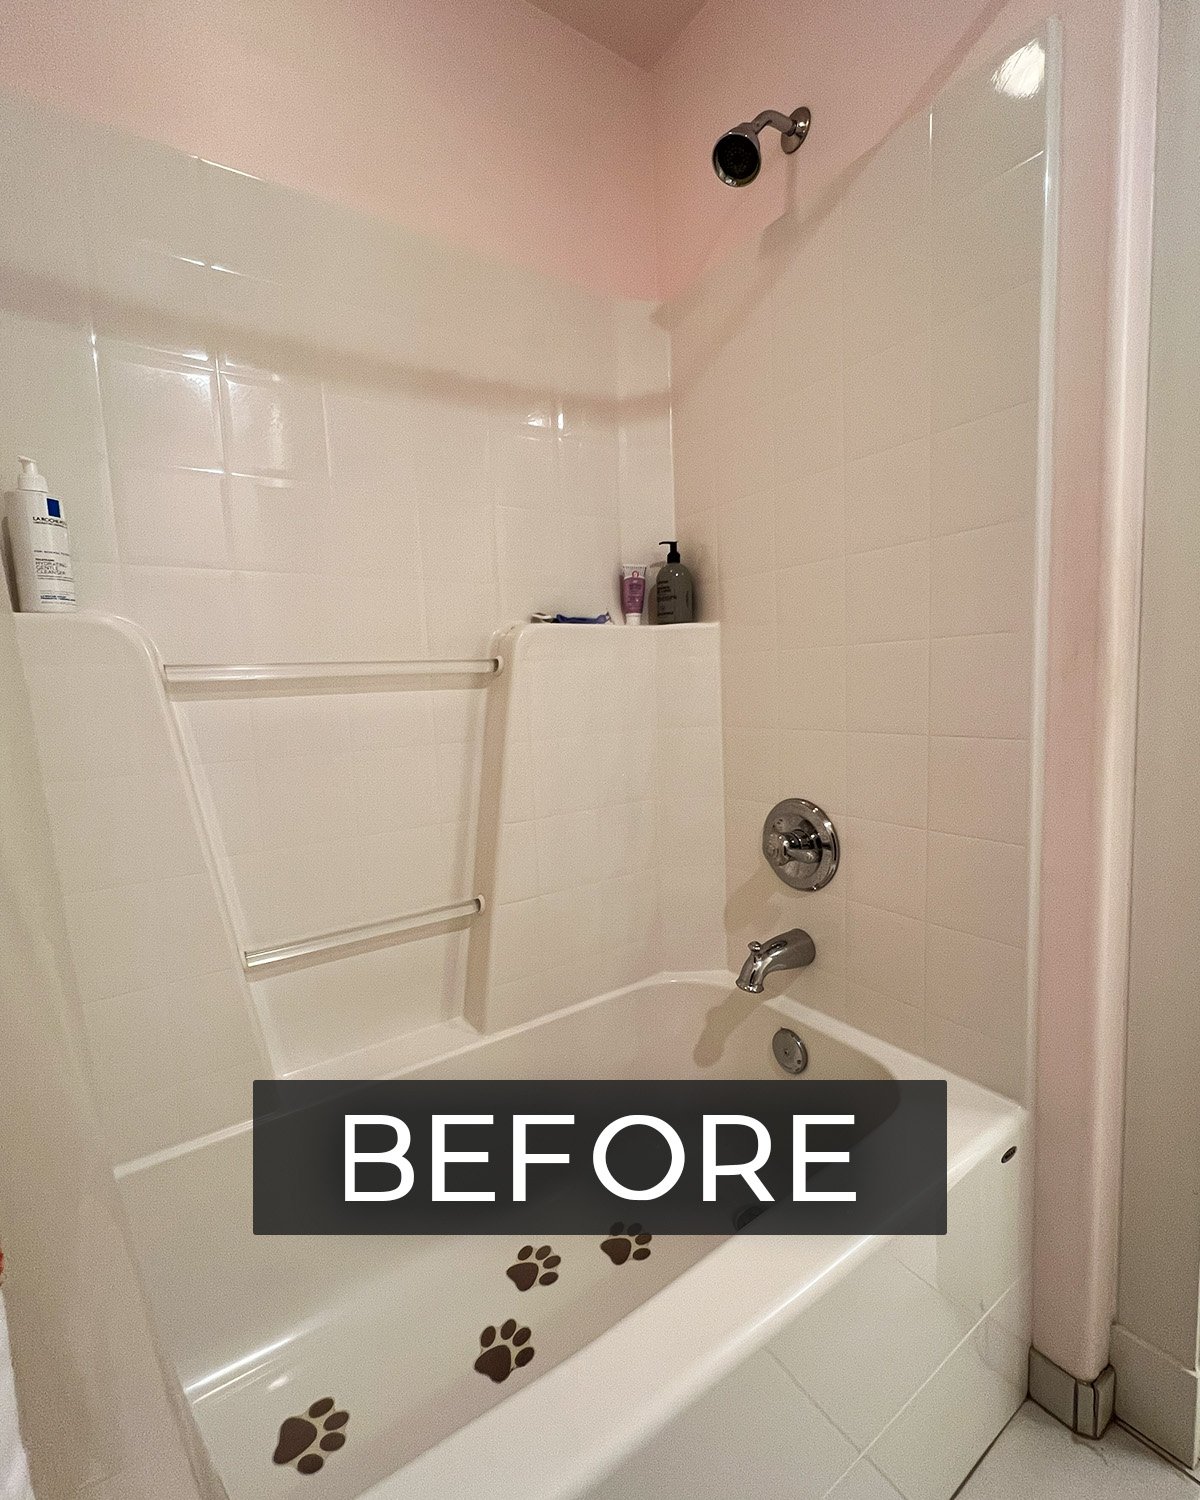
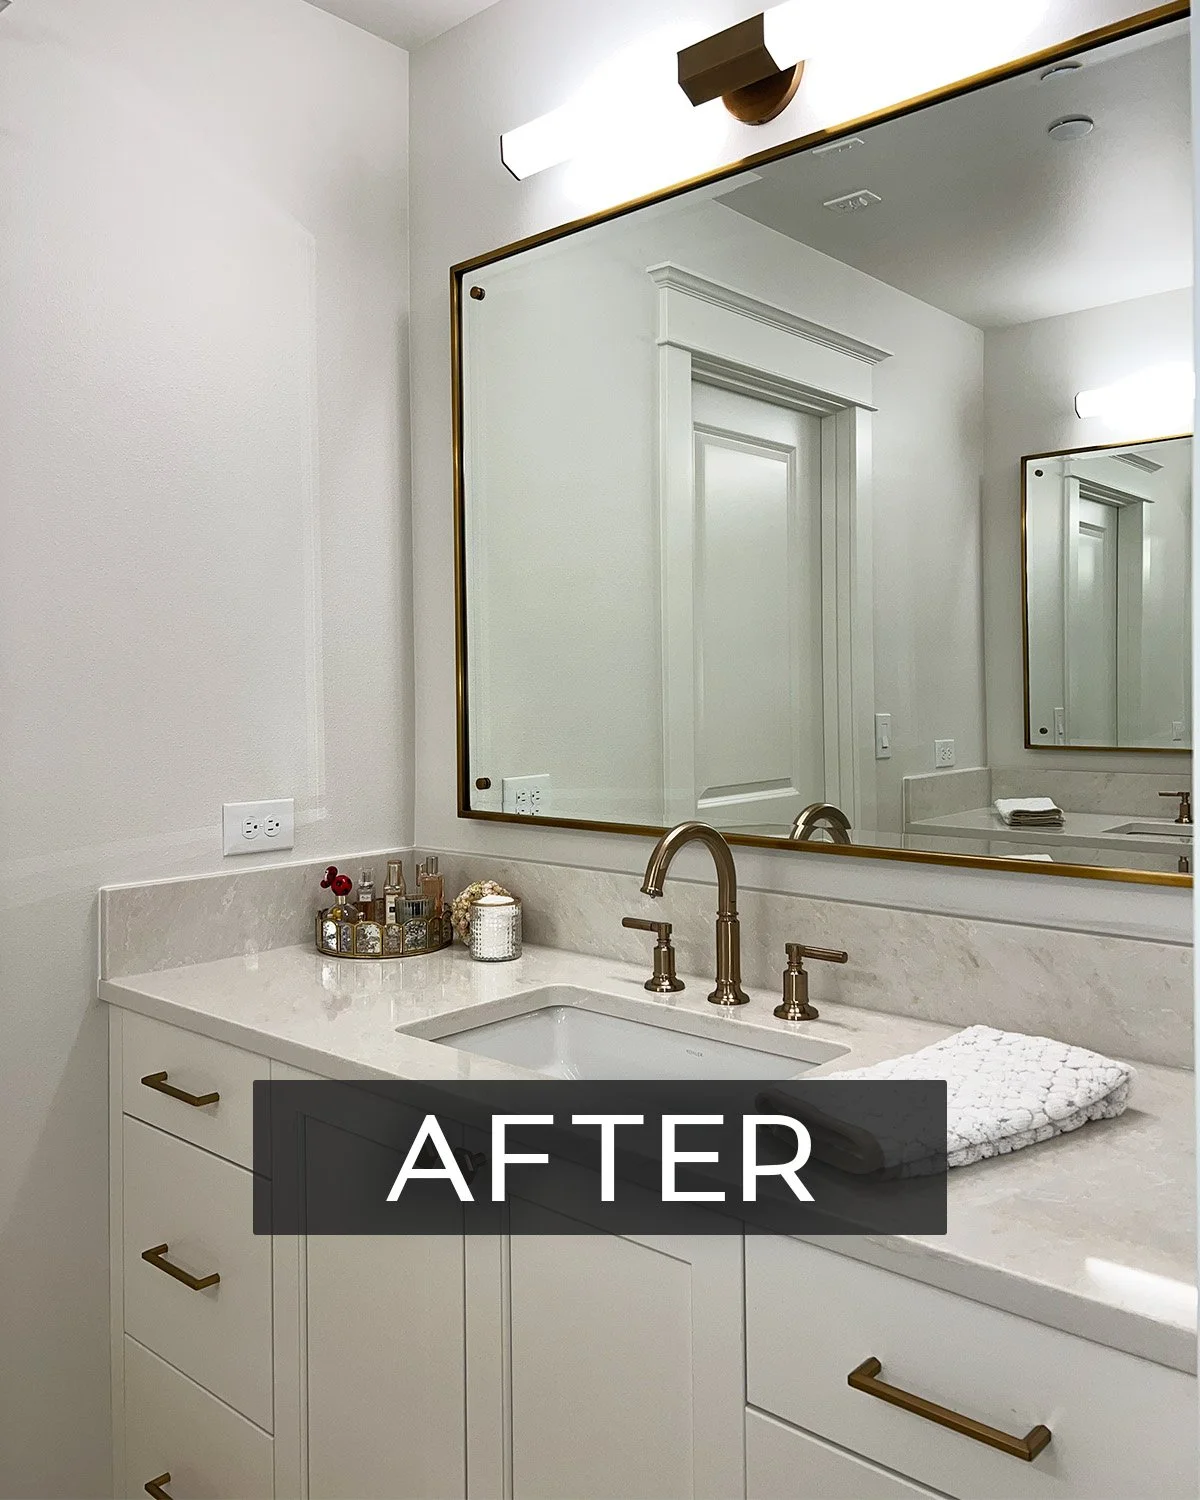
A bathroom upstairs was designed years ago for two little girls, complete with pink walls and sparkly countertops and backsplash. Those girls are grown now, so the space needs to grow up too, the same idea behind designing a kids' bathroom that ages well. That bathroom is being reimagined as a guest bath that will work for the house long term, whatever the future holds. Down the hall, the boy's bathroom has its own reason for a refresh: the walls and ceilings were painted blue, but the tile, cabinets and countertops are still in style.
While deciding on what to change immediately, it made the most sense to start with the bathrooms and laundry room upstairs. All of the demolition, ripping out tiles, removing cabinets and countertops, drywall repair and paint needed to happen BEFORE the new carpet goes in upstairs.
What's Staying and What's Changing
Before deciding what to replace, Kelly asked herself the same question she'd ask any client: is there anything worth keeping? Sometimes floor tile still has life left in it, or cabinets just need a fresh coat of paint and new hardware. In the girls bathroom, the existing finishes had too much wear to make sense of salvaging, so a full refresh made more sense. In the boys bathroom, all of the hard surfaces were still in good condition, so a fresh coat of paint, a deep cleaning, and a new light fixture were all that were needed to update the space.
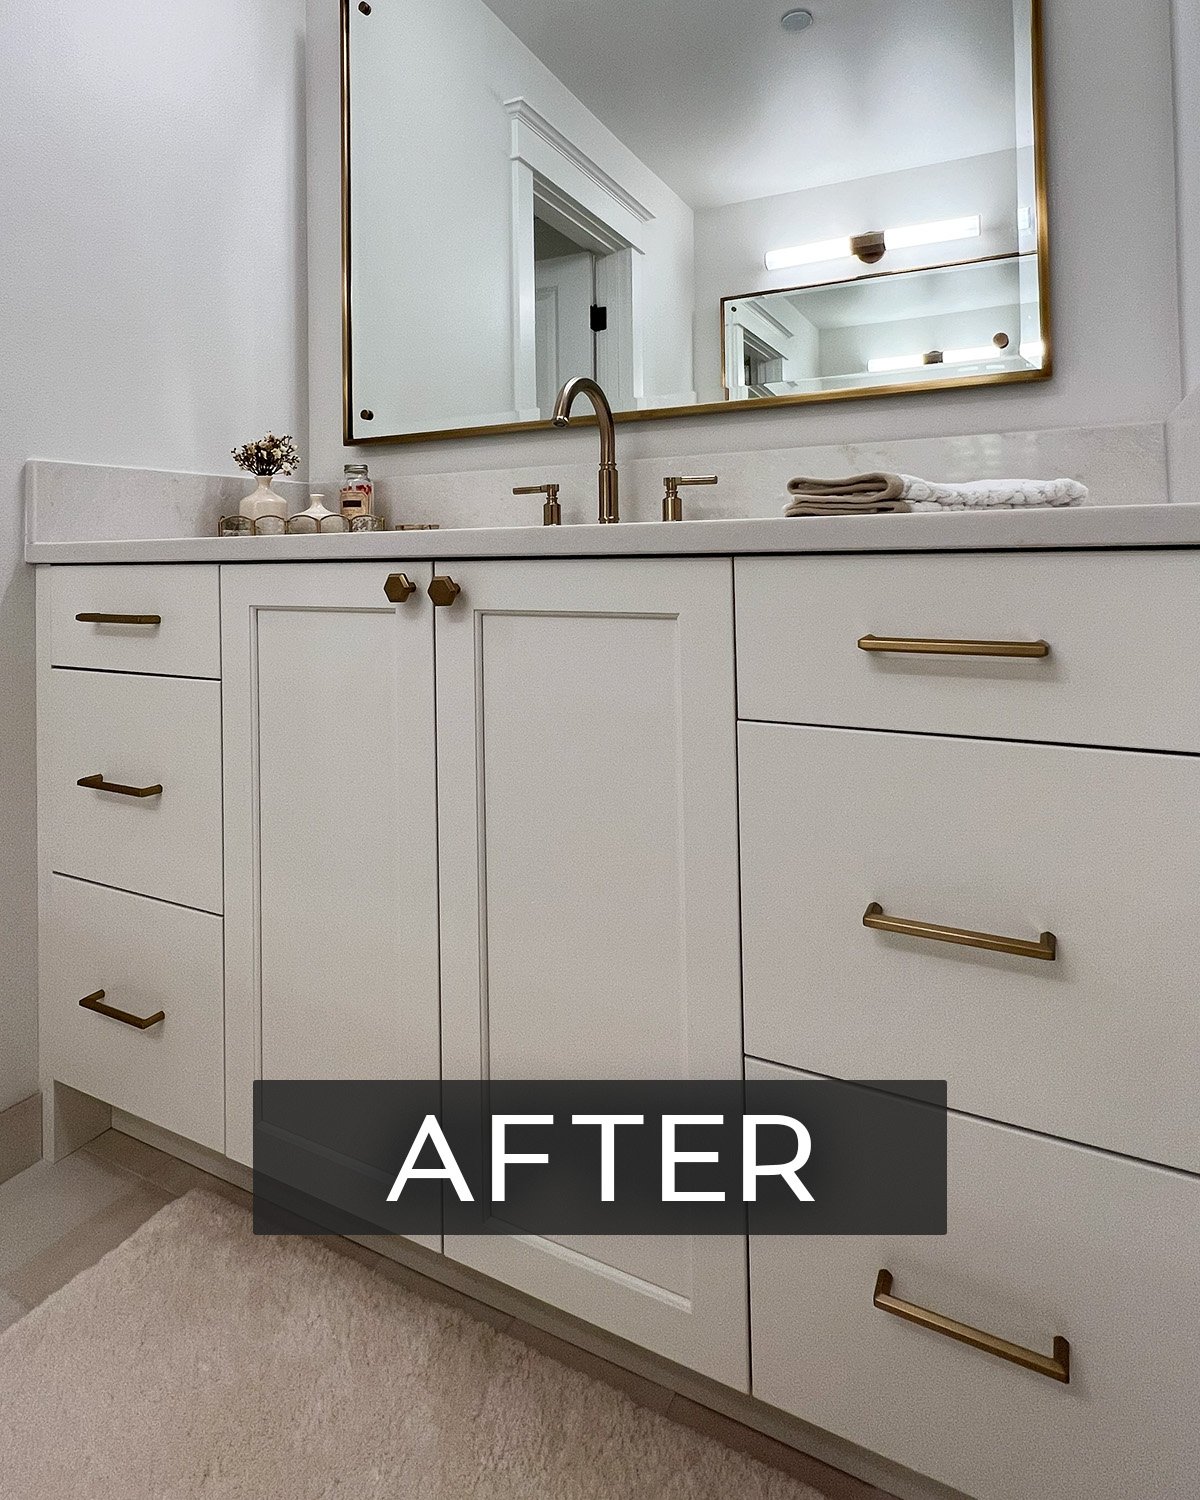
The plan across the upstairs spaces includes new tile in the girls bathroom and laundry room, white bathroom cabinets, fresh paint, and updated hardware and light fixtures, simple and classic choices that fit the character of the house. Kelly's also thinking about how the tile choices flow from one space to the next, so the hall bath, laundry room, and primary bath all feel connected rather than disjointed.
The Vendor Lineup
Kelly's holding her own home to the same standards she brings to every Sierra Homes project.
Cabinets - Bellmont Cabinets
Countertops - quartz from MSI fabricated by Dominis Stone
Bathroom tile - Tile Northwest
Laundry room tile - Ann Sacks
Paint - Benjamin Moore and Sherwin Williams
Painters - Guzmans Painting
Expect the Unexpected
As the the project is wrapping up, Kelly and Dan reflect on the reminder of every single remodel job. Opening up walls is like opening up a Pandora's box, you never know what you may find that will (literally) throw a wrench in all of the best laid plans. You need to be ready for "plan B."
In the case of the girls bathroom, the plan was to remove the hinged bathroom door and install a pocket door to make more room and create a more open flow in the space. But as soon as the drywall was removed and studs were exposed, so was a giant air vent that could not be moved without tearing out more walls. So no pocket door. The swinging hinged door would have to stay.
That door issue was just a minor problem with an easy solution, much easier fix than some of our other remodels, but just a reminder to always expect the unexpected when starting a remodeling project!
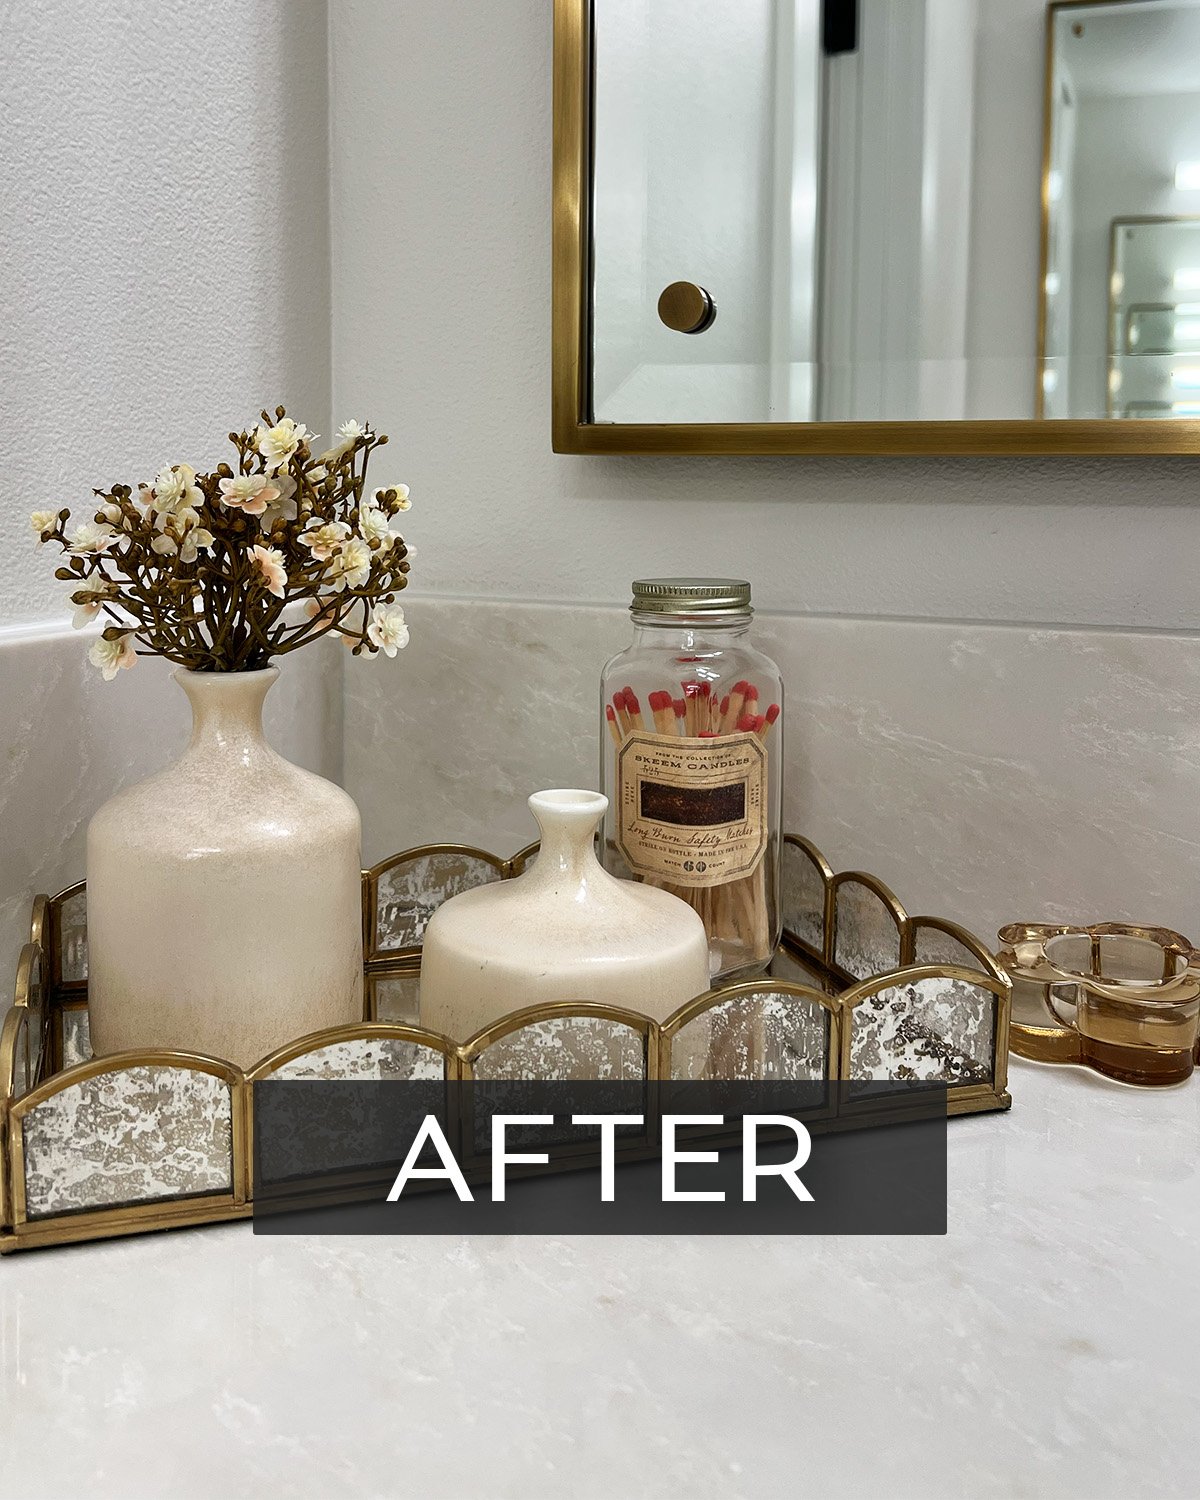
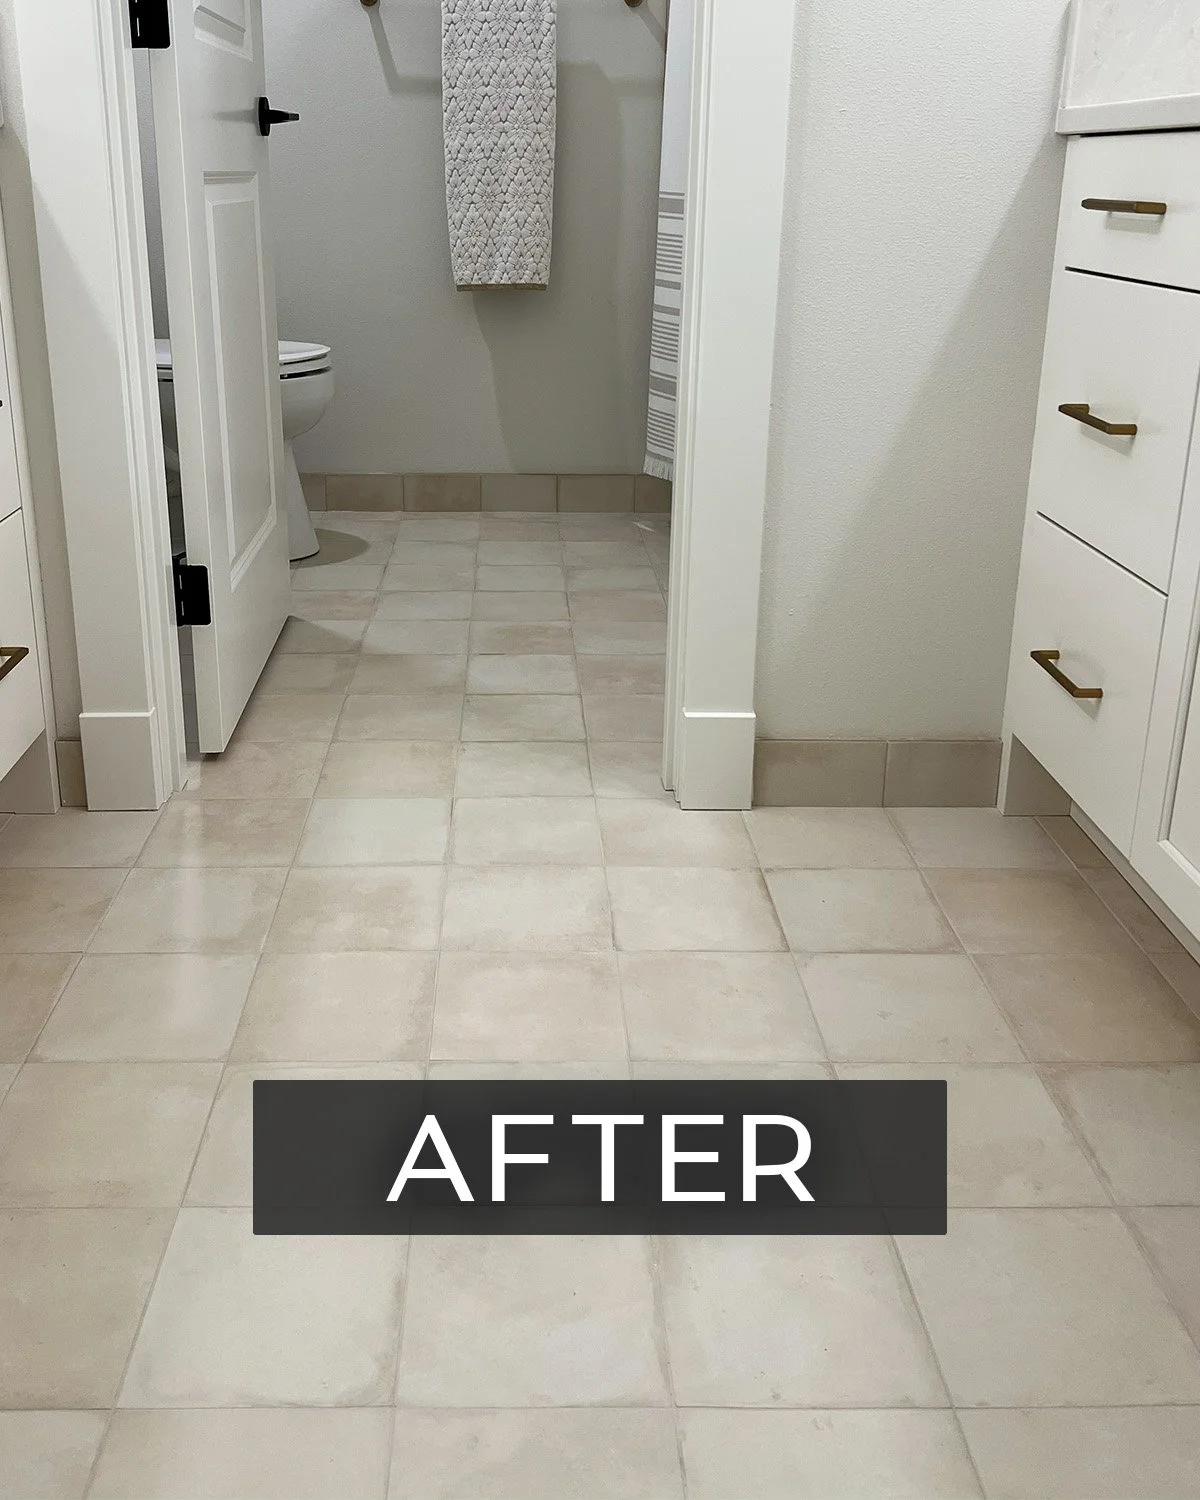
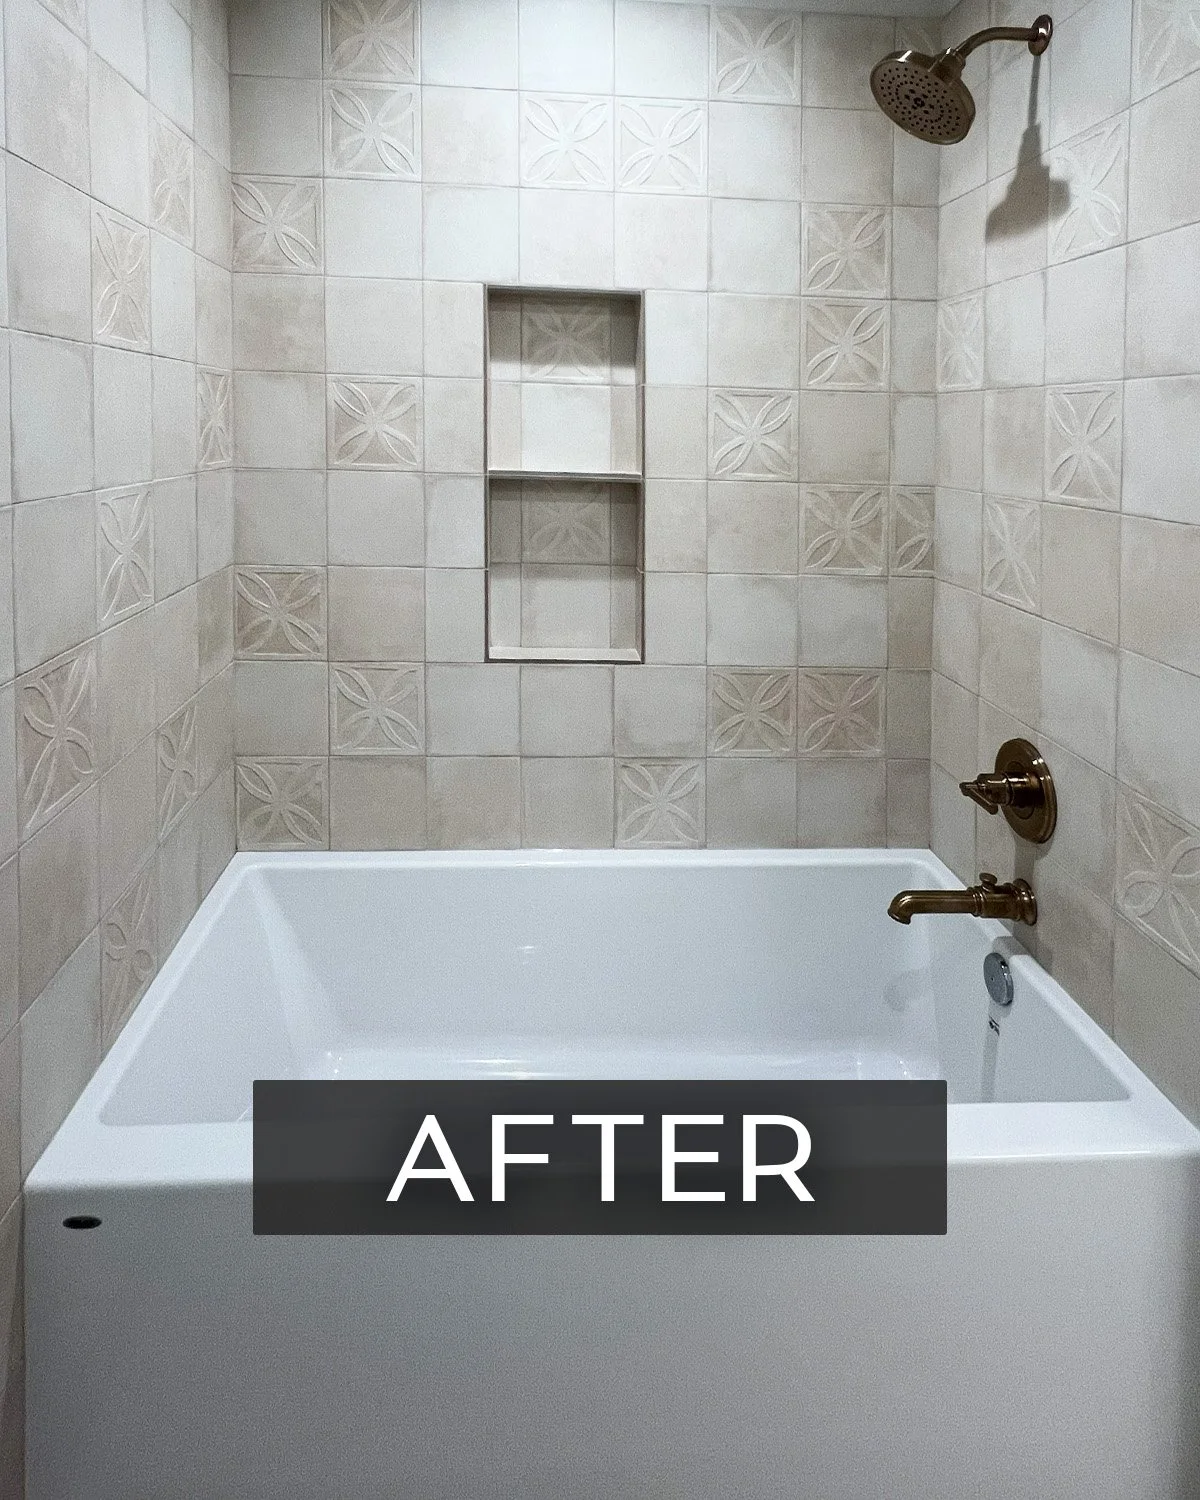
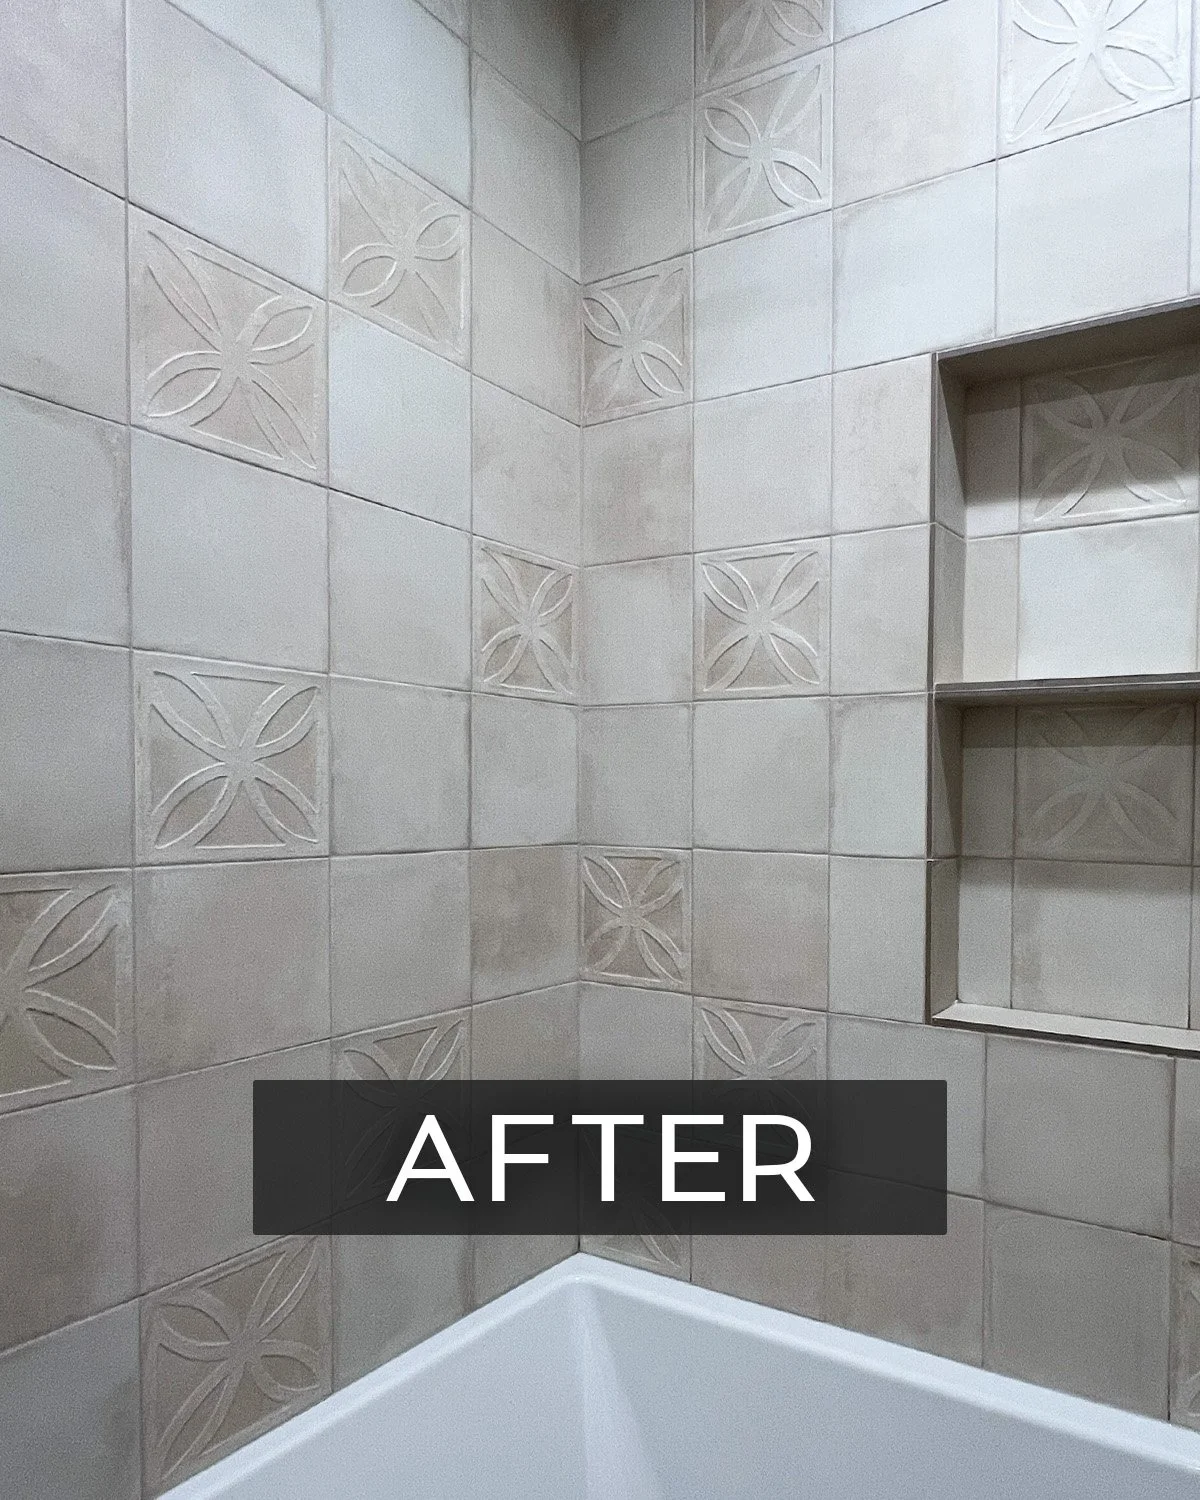
Standing back and taking a look at the transformation is very rewarding and, overall, Dan and Kelly feel they achieved their goal. Take a look at the gallery to see before-and-afters of the girls bathroom changes!
Ready to rethink a space in your home?
Even for a designer, remodeling your own home takes the same clarity we bring to every client project: knowing what to keep, what to change, and what order to tackle it in. If you're weighing a similar decision for your own home, whether it's one room or the whole house, we'd love to help you think it through.
Formal to Functional: Living Room to Home Office Remodel
What looked like a straightforward door installation turned into a full framing rebuild — and a hunt through Seattle's oldest millwork yards to find trim that hadn't been produced in years. Here's what we found inside the walls.
What started as an “easy” door-hanging job turned into a trip through Seattle's oldest millwork yards, creating custom-milled trim, and eventually ended with a husband’s work (finally) off the kitchen counter.
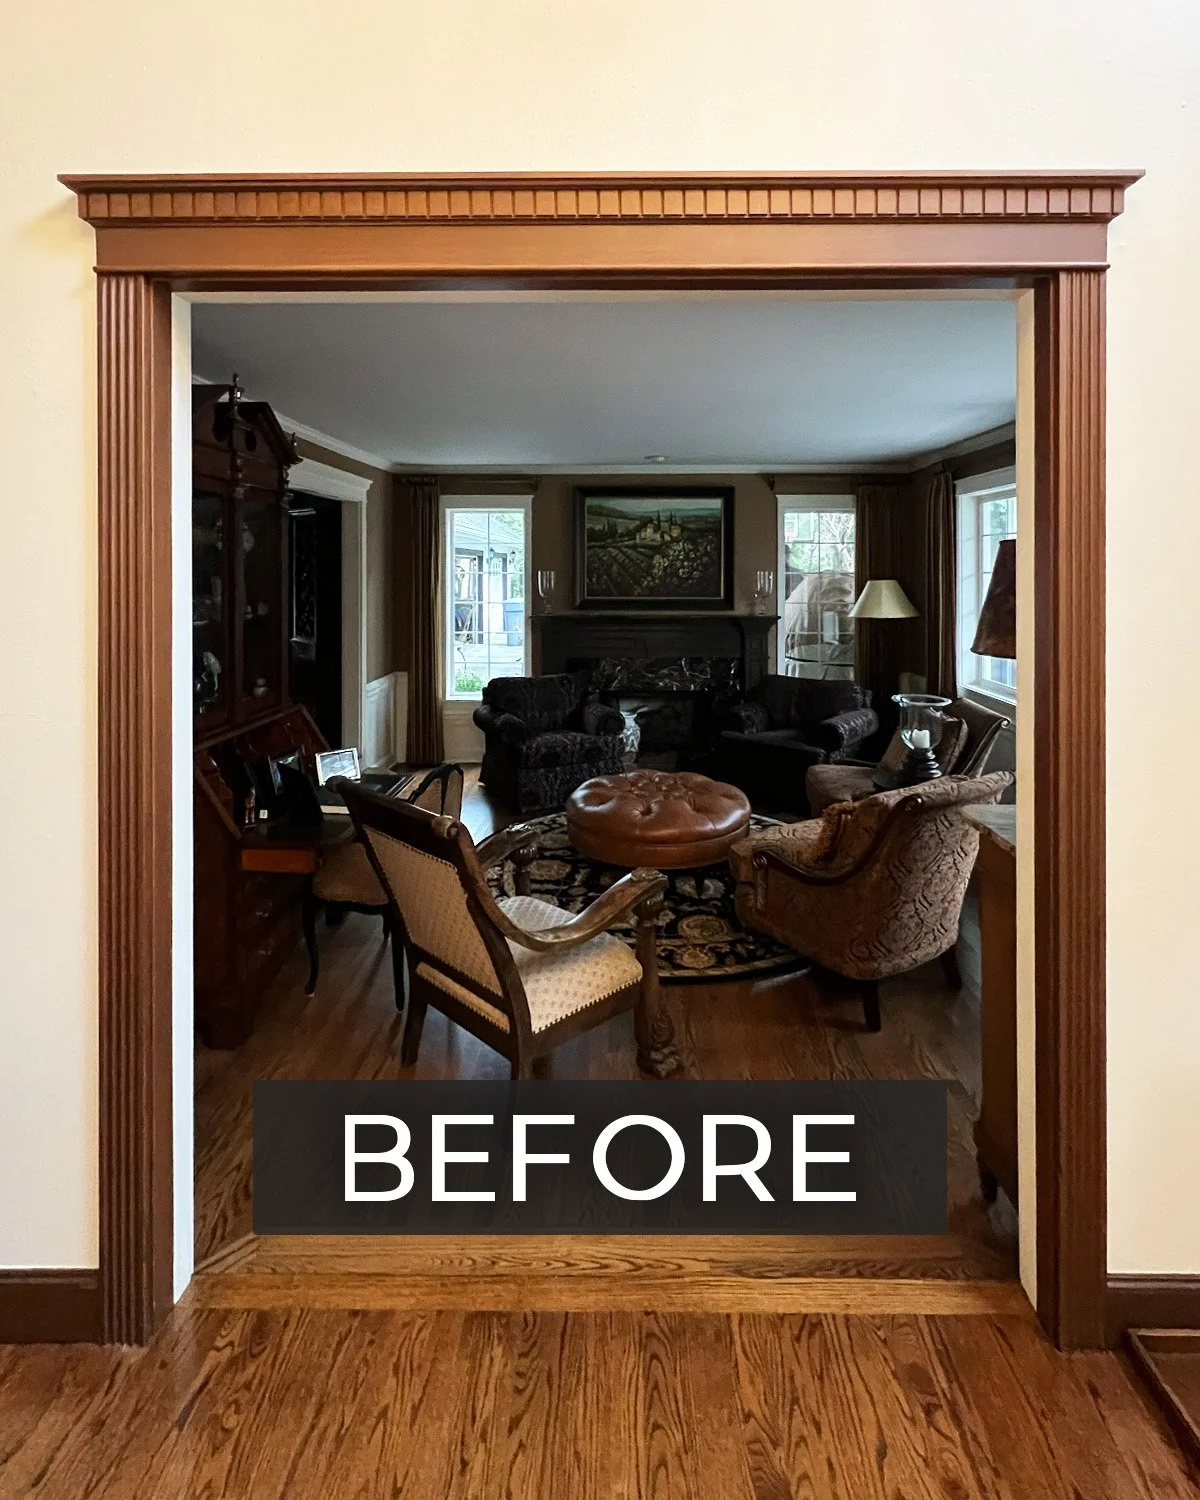
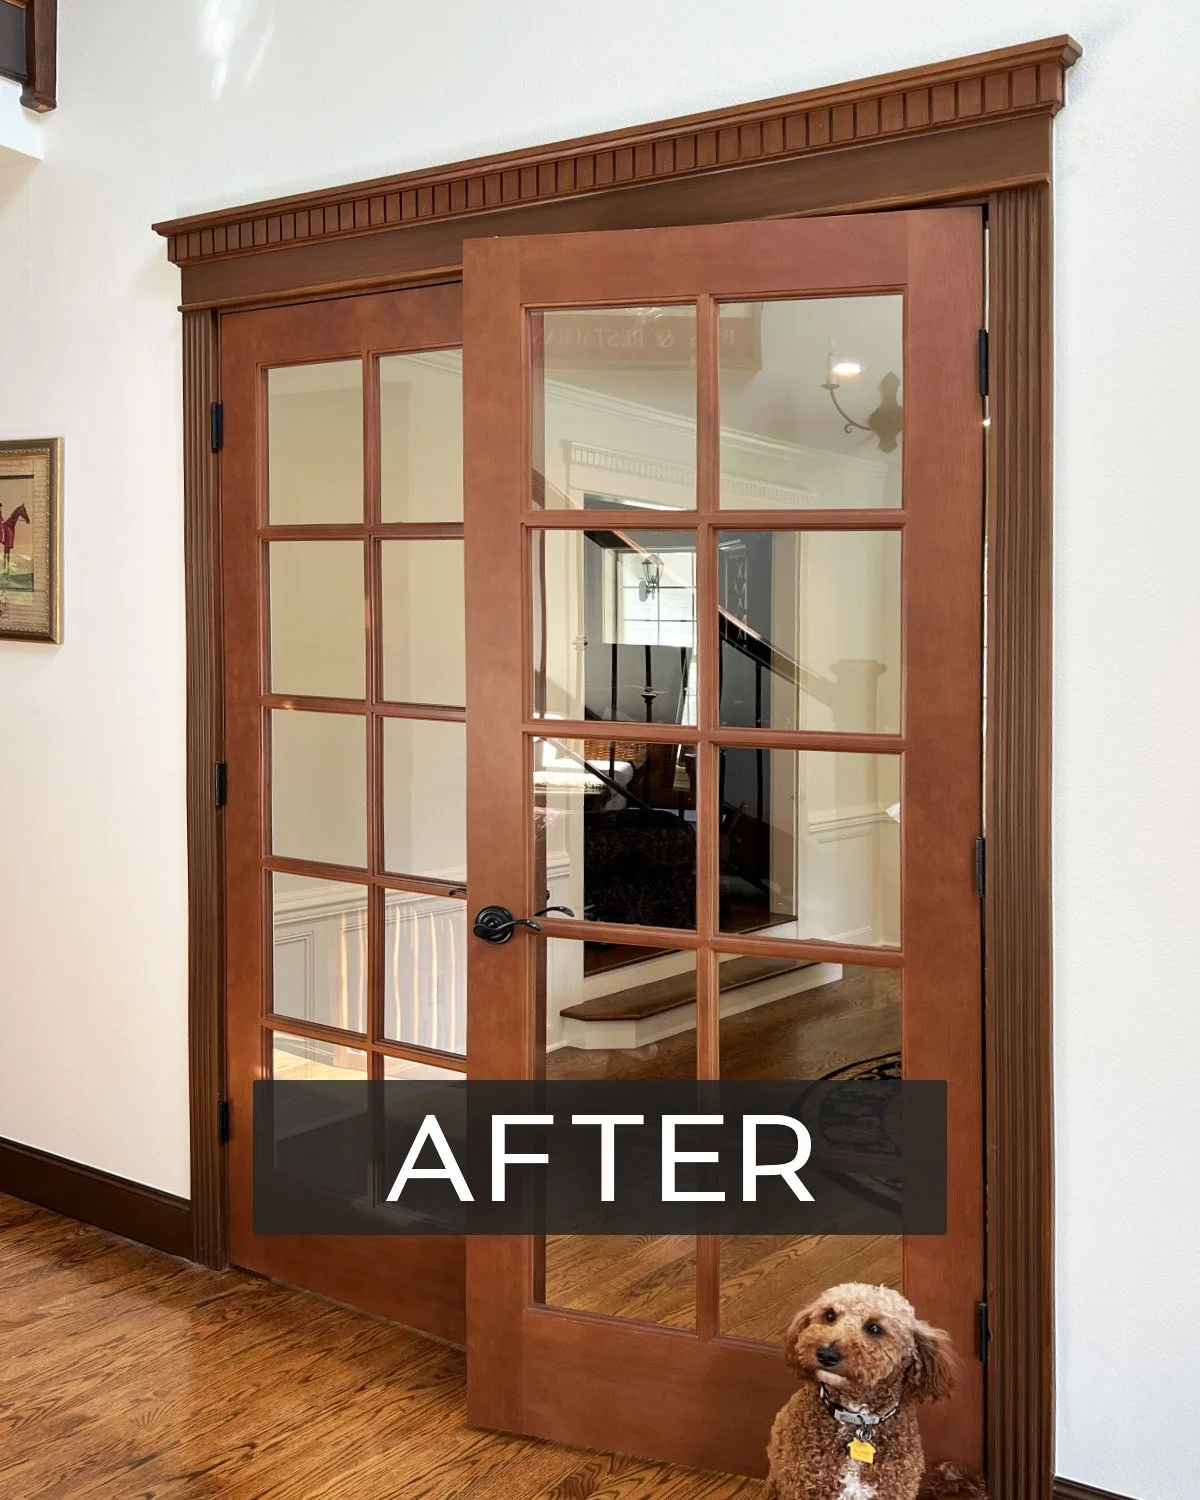
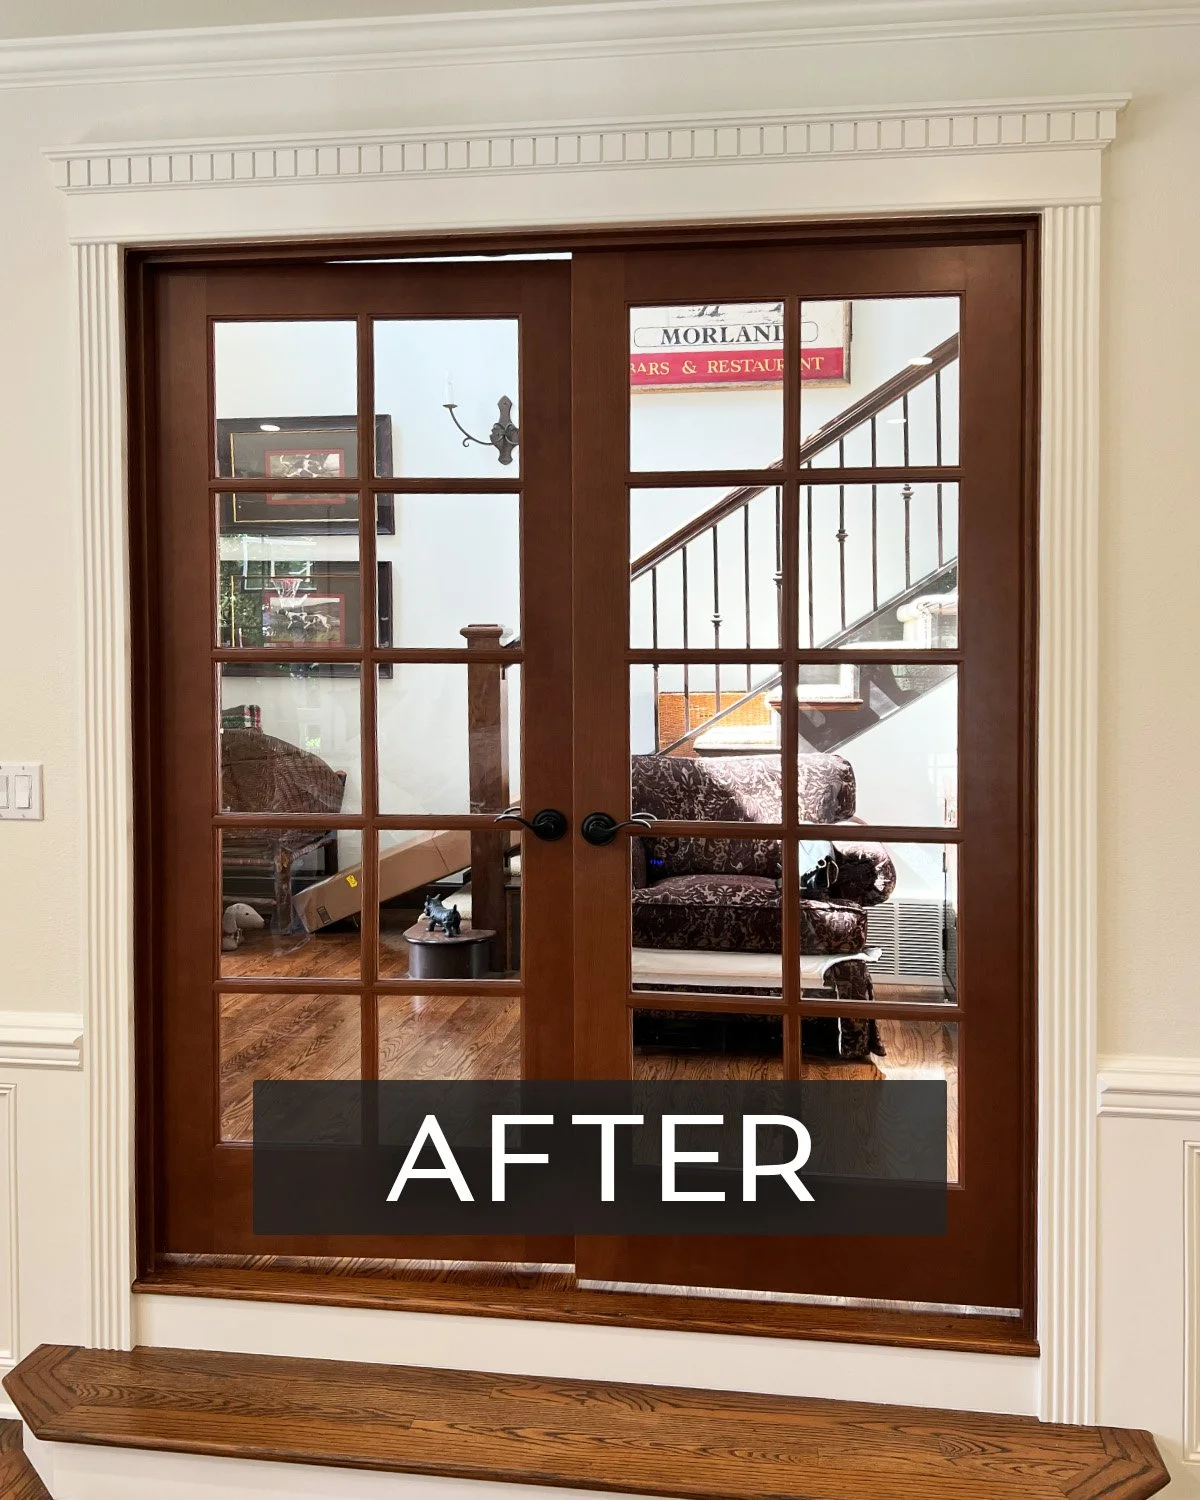
A homeowner wanted to convert her formal living room into an office for her husband, who recently started working from home and had his computer and paperwork taking over the kitchen. She simply needed a closed off space for him by adding double doors onto a wide cased opening that led into the old living room, which seemed straightforward enough.
The problems behind the doors
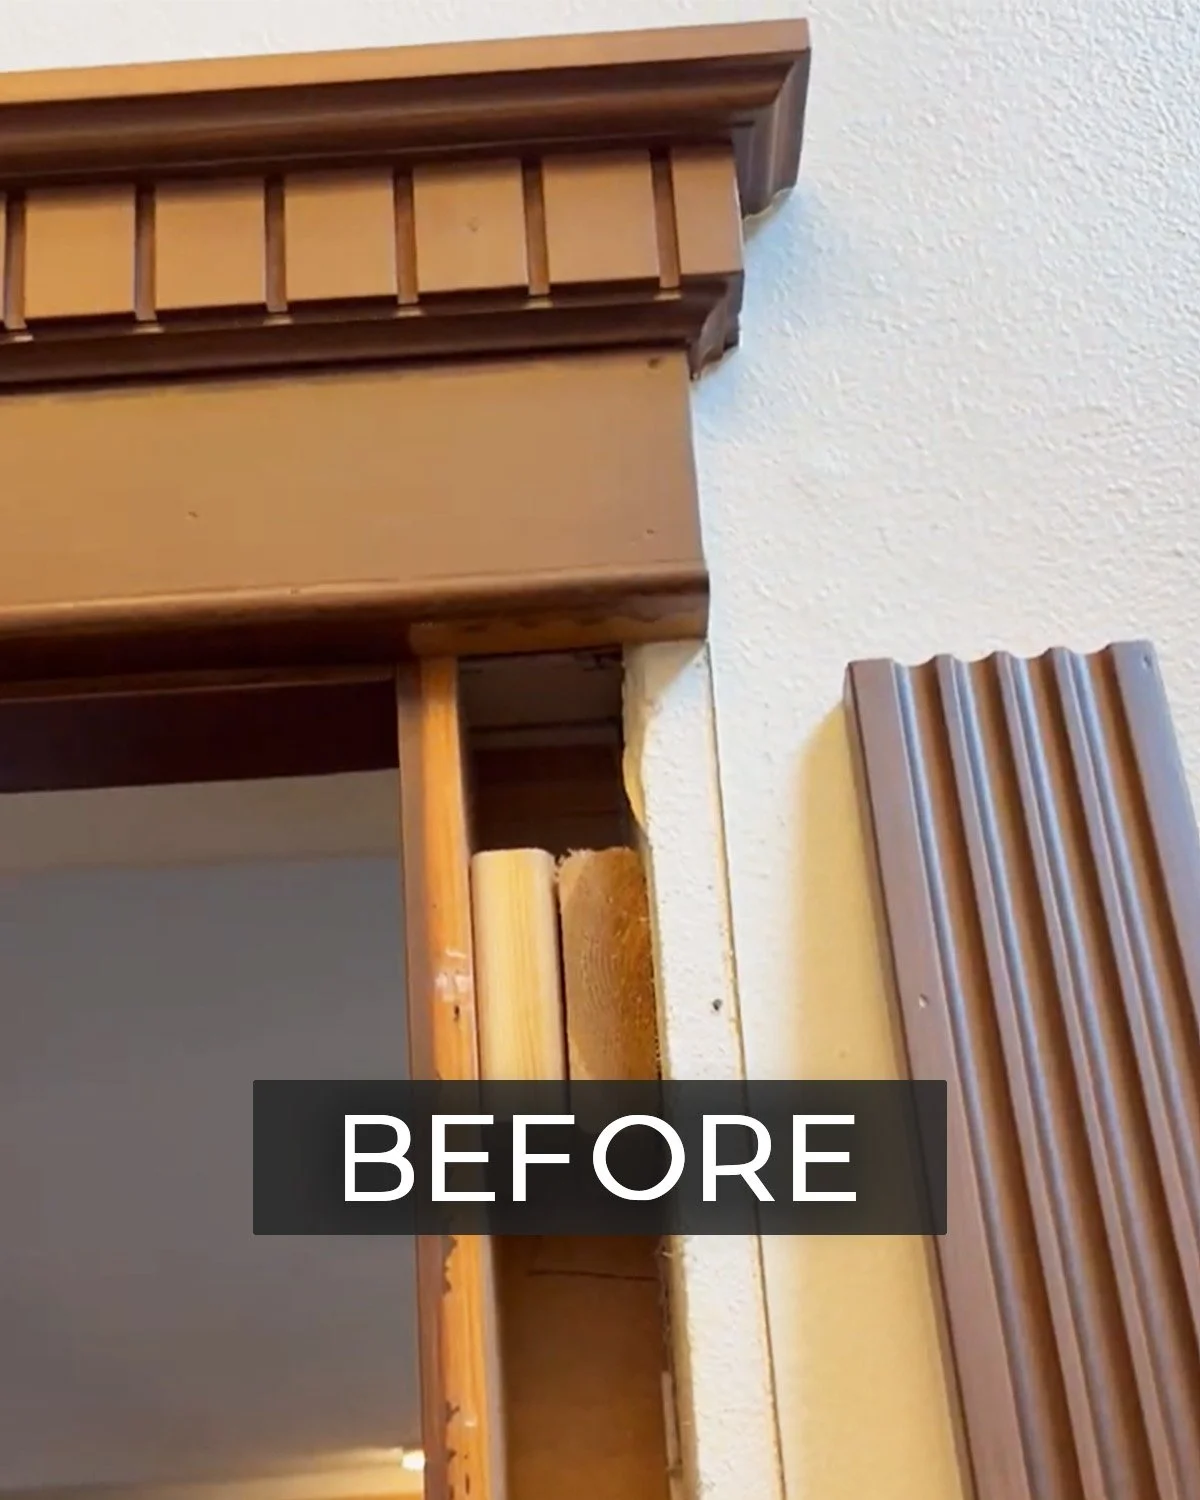
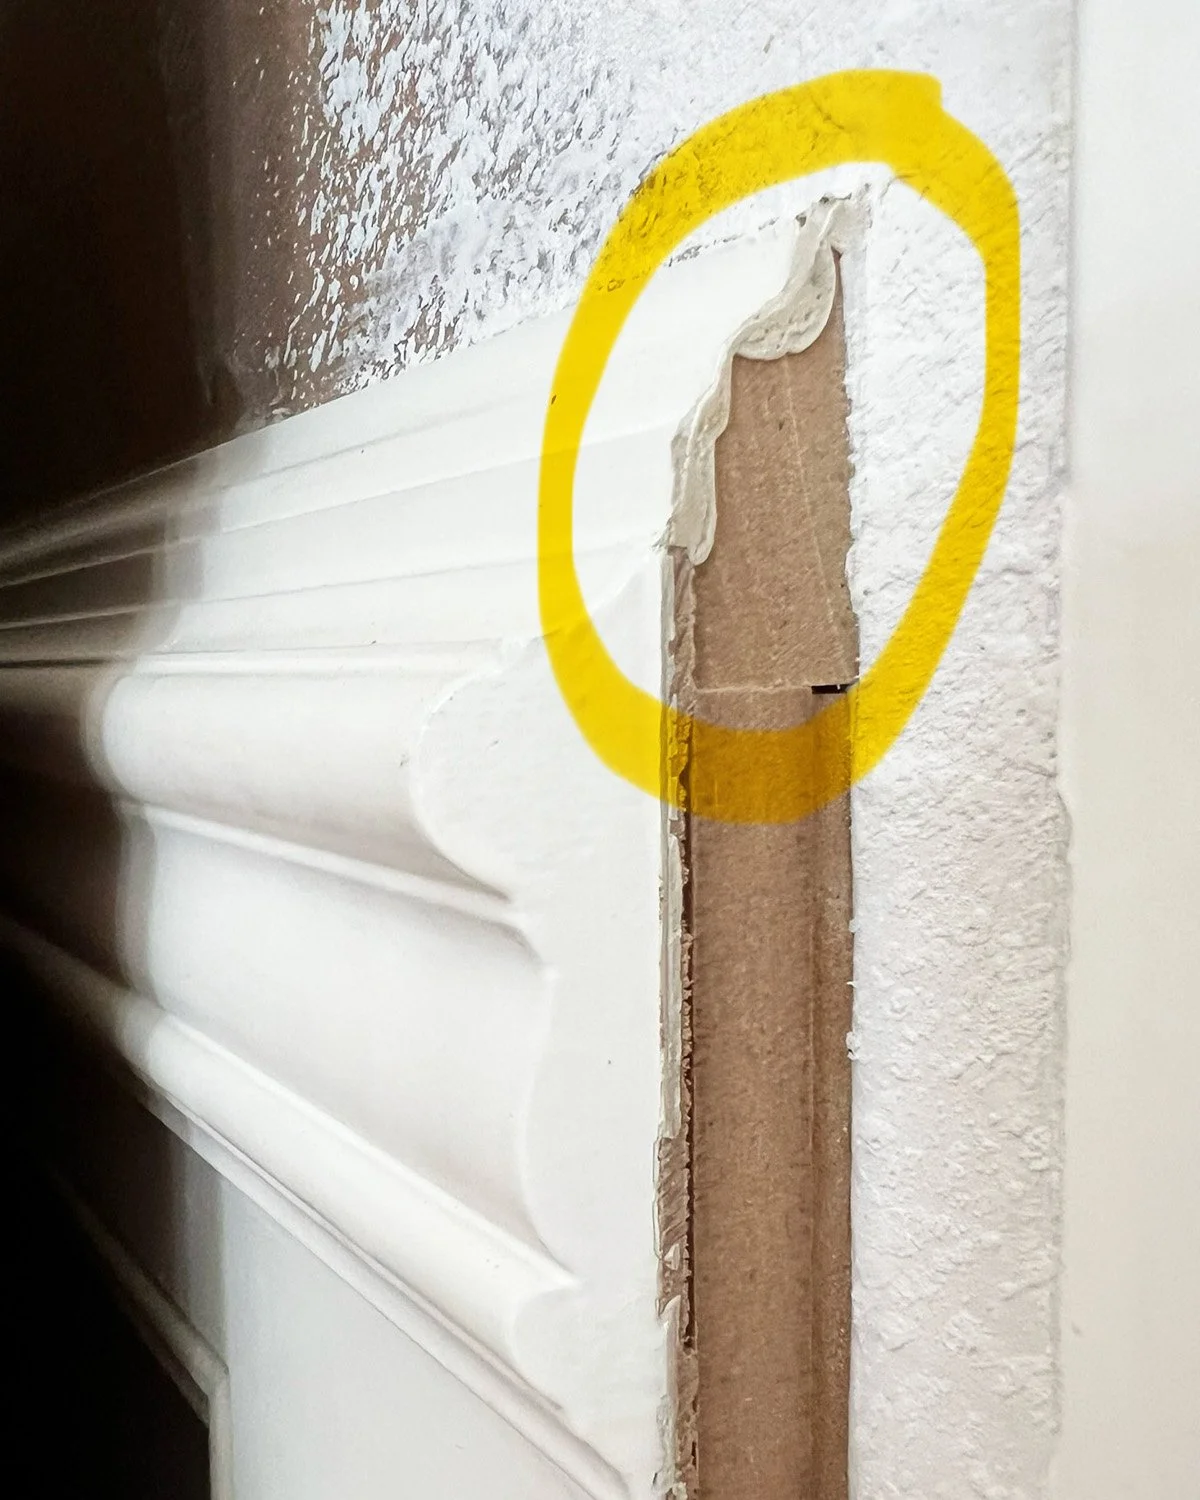
First, the doors were ordered, but took weeks longer than expected due to weather and shipping issues. Once they arrived, the custom factory staining (to match the rest of the doors in the house) took additional time. Next, when our finish carpenter pulled back the casing to prep for the door installation, he found something that stopped the job cold. The cased opening had a 4 to 6 inch gap between the framing and the casing, and the trim was literally hanging on drywall with no structural support behind it.
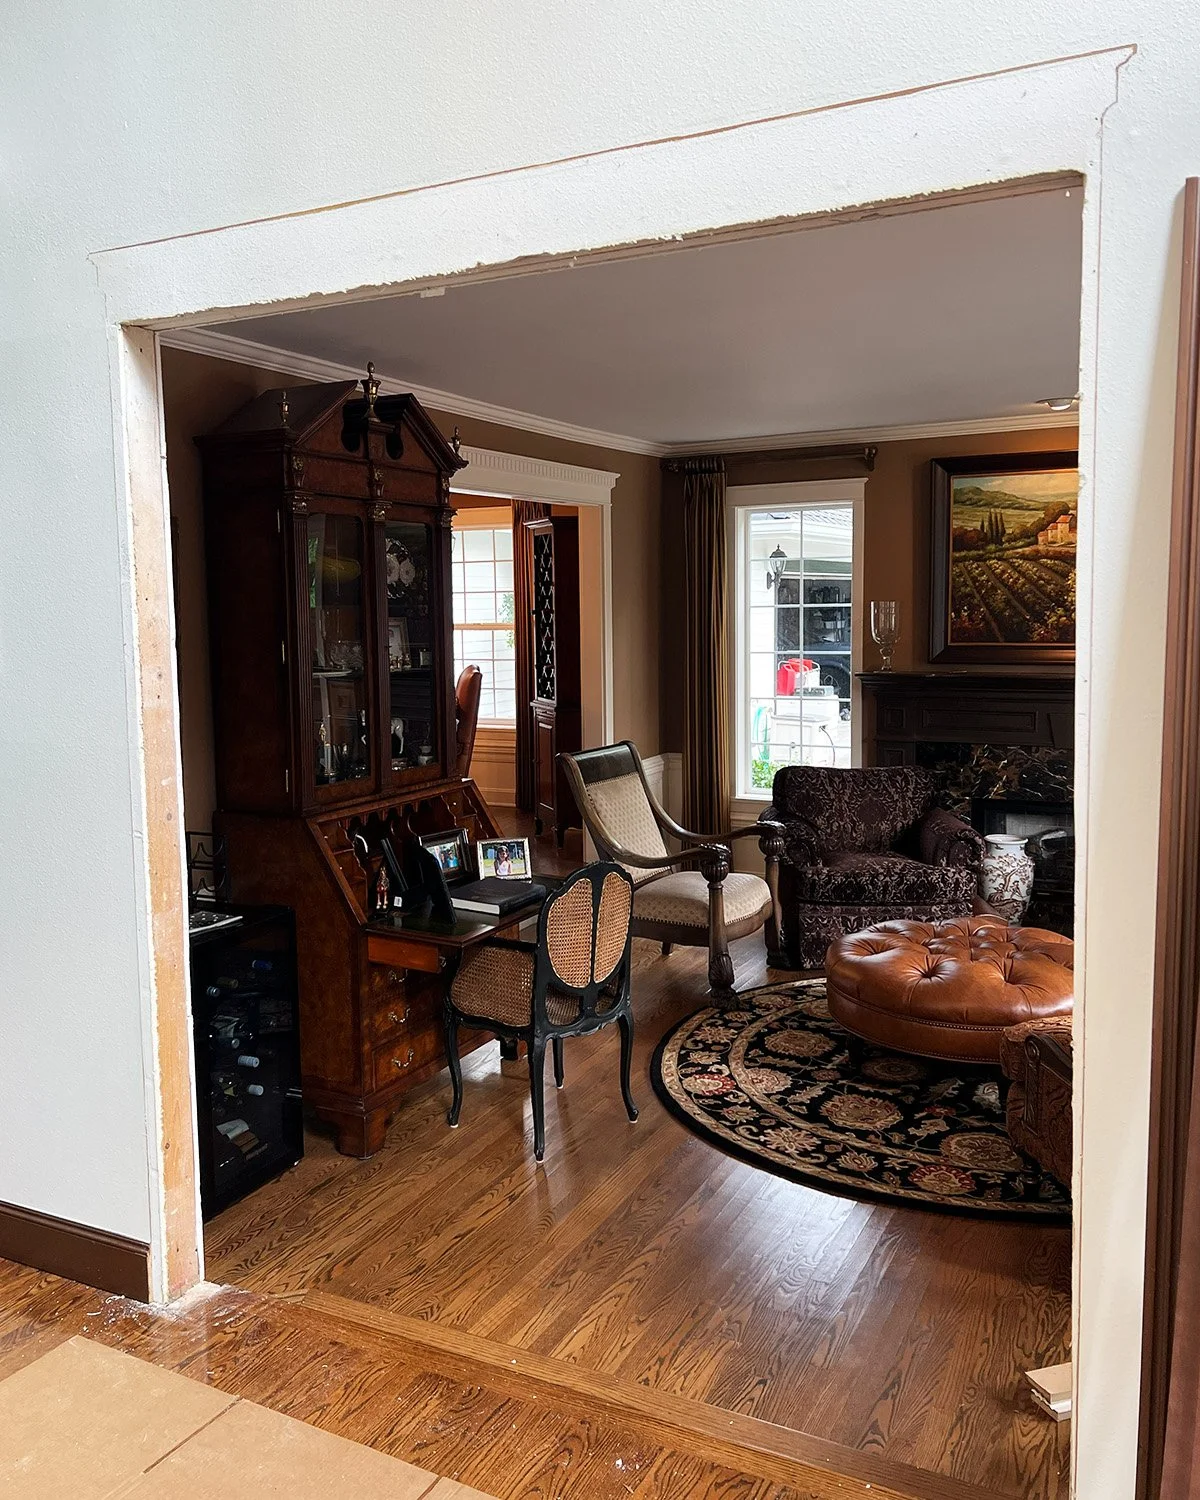
The heavy weight of wood and glass double doors cannot hang on extended drywall alone. The casing had to come out completely, the walls were reframed correctly with proper two-by-fours, plus a new header was added, and the walls were drywalled, textured and painted before we could even think about installing the doors.
The millwork hunt
Rebuilding the framing was an unexpected structural challenge, but easy enough to fix. The bigger adventure turned out to be matching and replacing the trim. What seemed like a quick and easy $3,000 job was becoming closer to a $10,000 job.
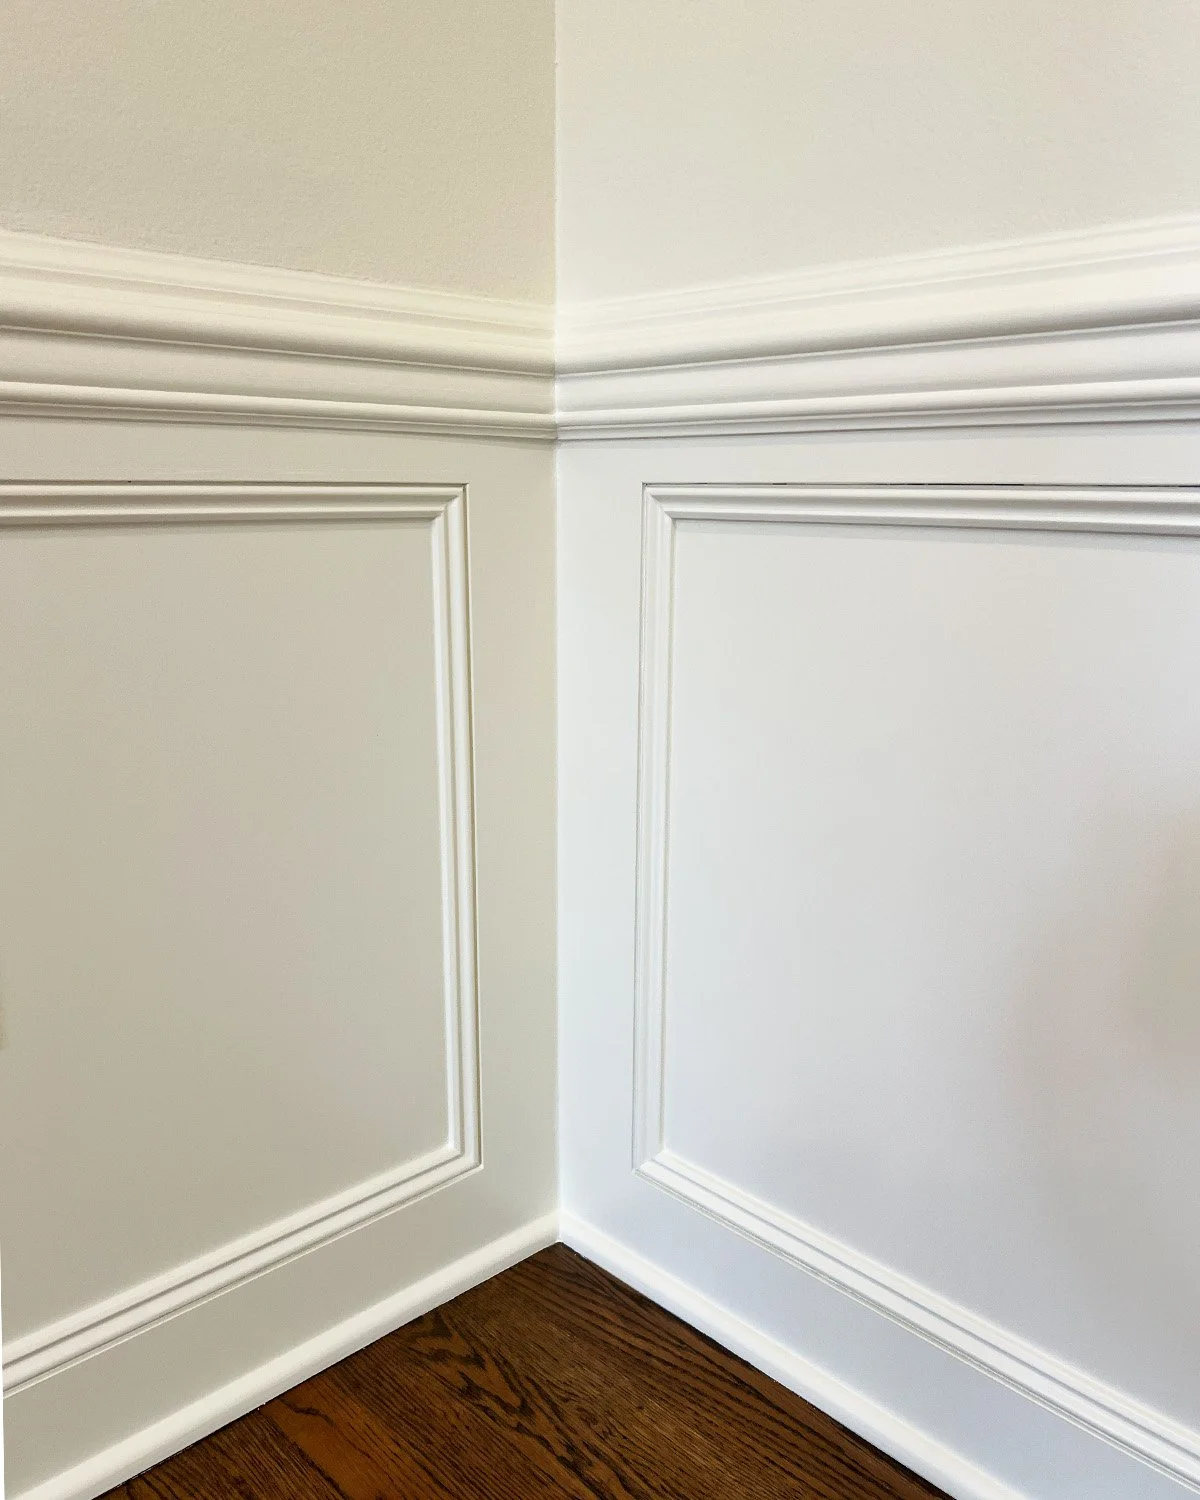
Built in the 1990s, the home had beautiful existing millwork throughout. Most of that was stained, but in the formal living room (now office), the custom millwork included very detailed casings, headers and an intricate chair rail, all painted white. Since we had to reframe the size of the door opening, there was a 3” gap on each side that needed to be filled in with millwork. Any new trim - casing, headers and chair rail details had to match to the existing 1990s millwork.
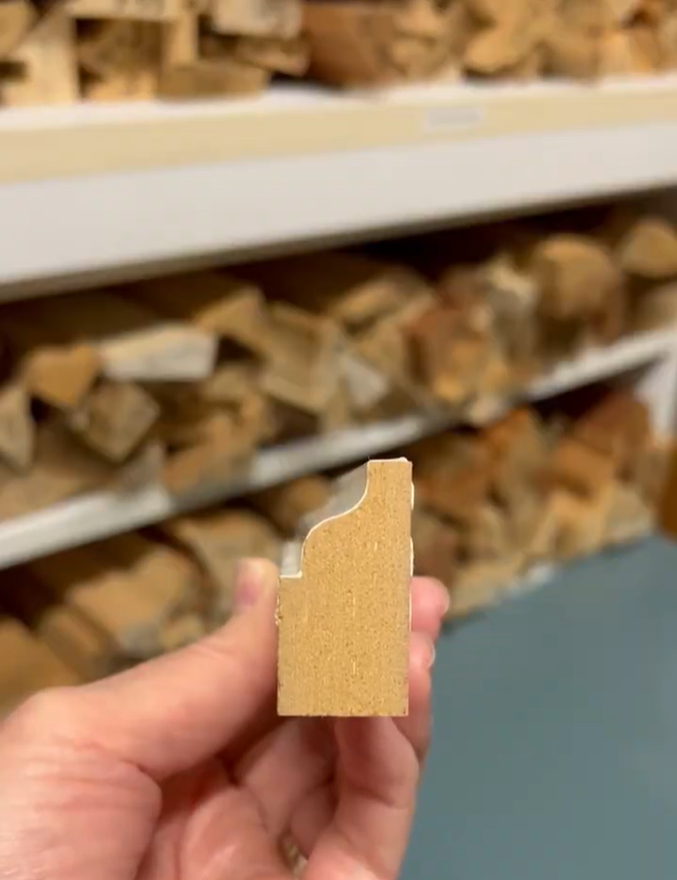
Custom millwork profiles aren't something you find at just any hardware store, and this particular profile hadn't been produced in years. So Kelly visited Seattle's older millwork yards — O.B. Williams (since 1889) and Limback Lumber (since early 1900s)— with a sample piece in hand, looking for a perfect match.
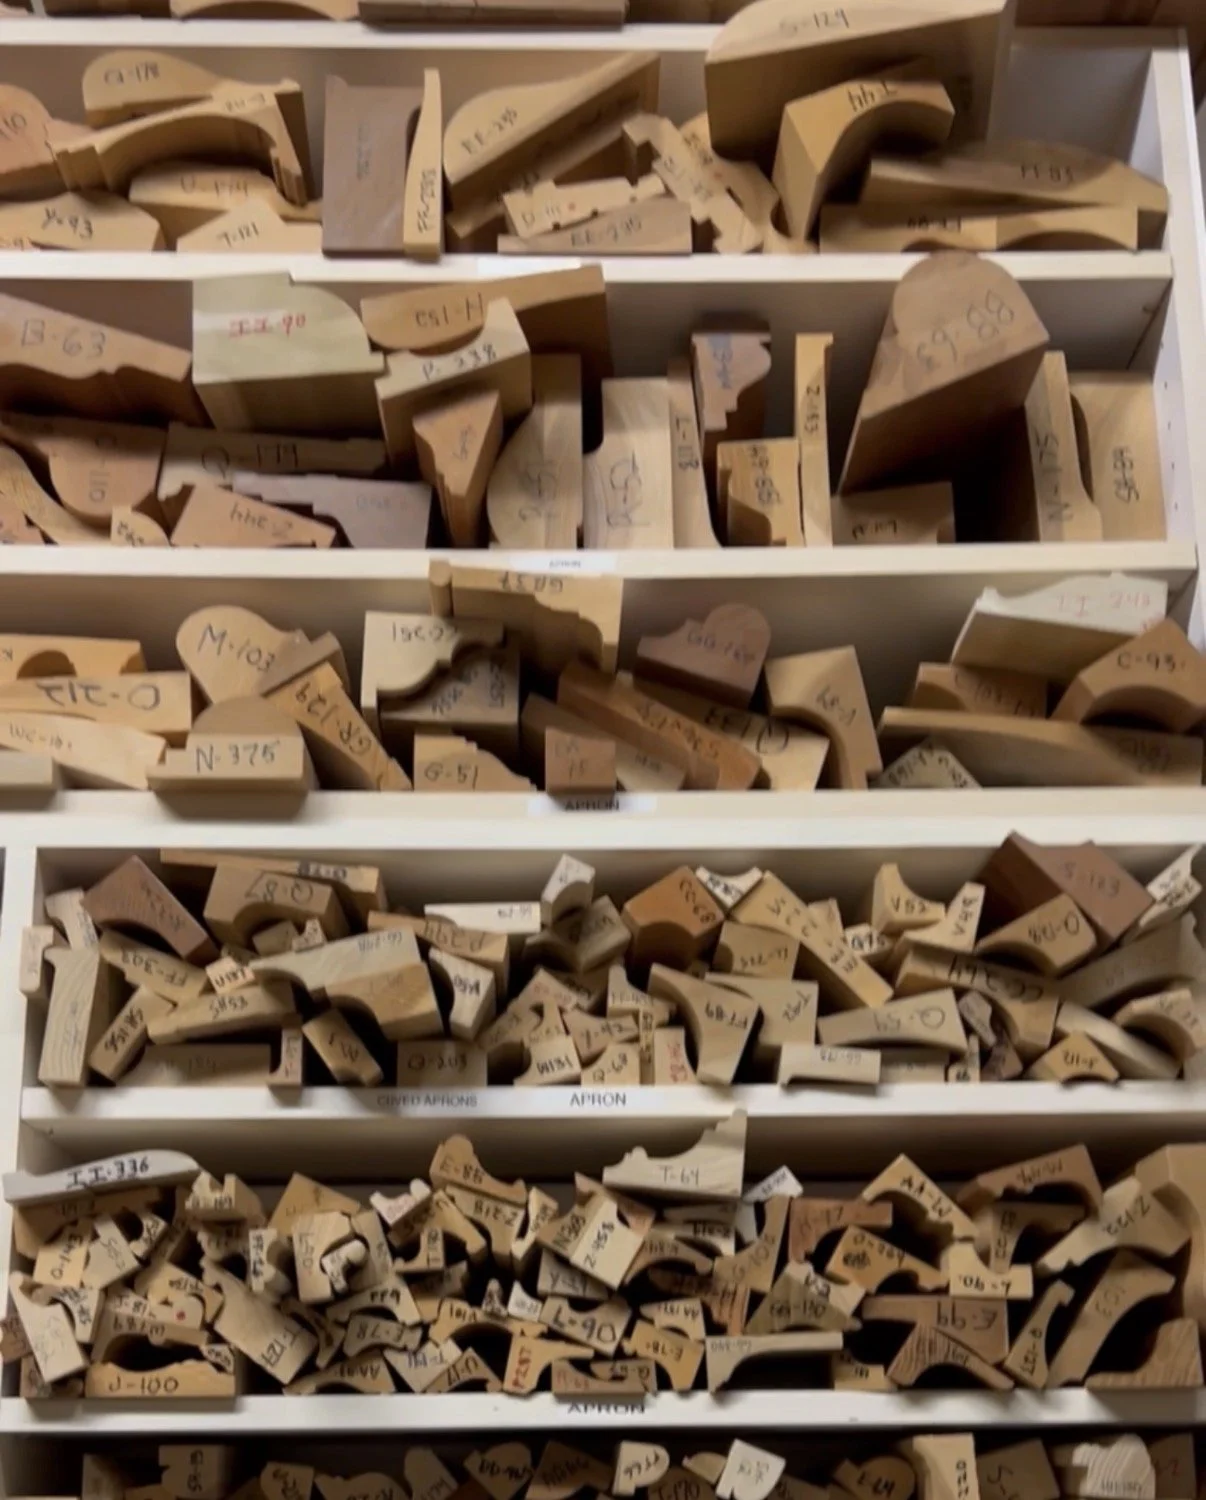
Kelly spent hours going through thousands of stacked profile samples, each one representing a different era and style. The profile in question was from the early 1990s, not particularly rare in terms of age but obscure enough that locating it required working through what felt like a catalog of nearly every trim piece ever produced in the Pacific Northwest. The first supplier didn't have the profile, but at the second shop, she handed over the sample piece and they recognized it immediately. They had the tooling to custom-mill the pieces she needed, and they cut them to spec.
The result matched the rest of the house seamlessly.
What the finished space looks like
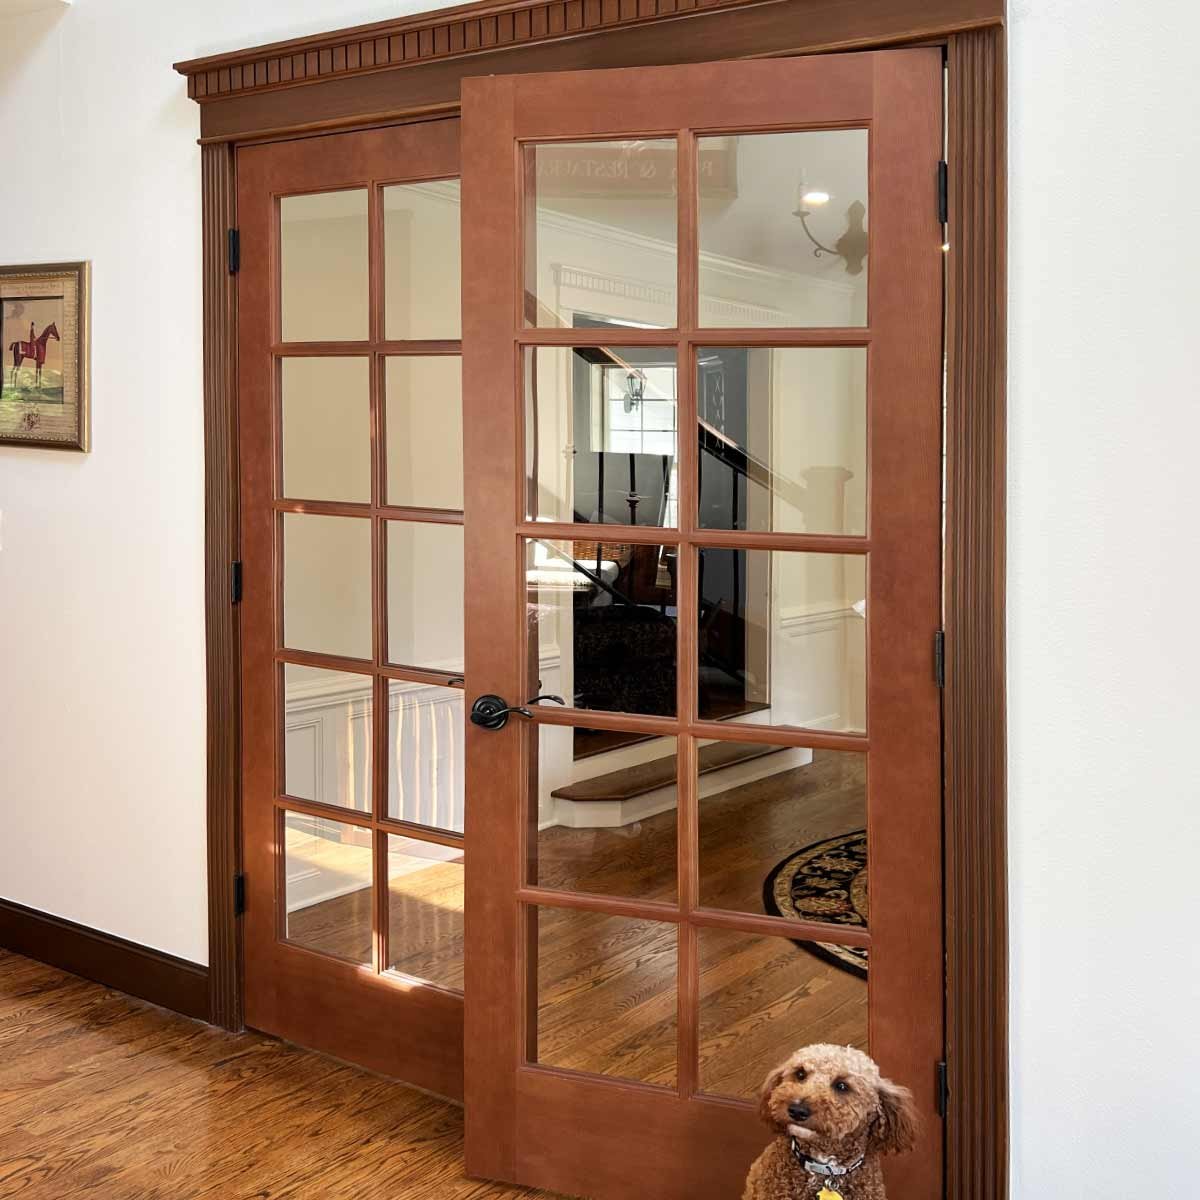
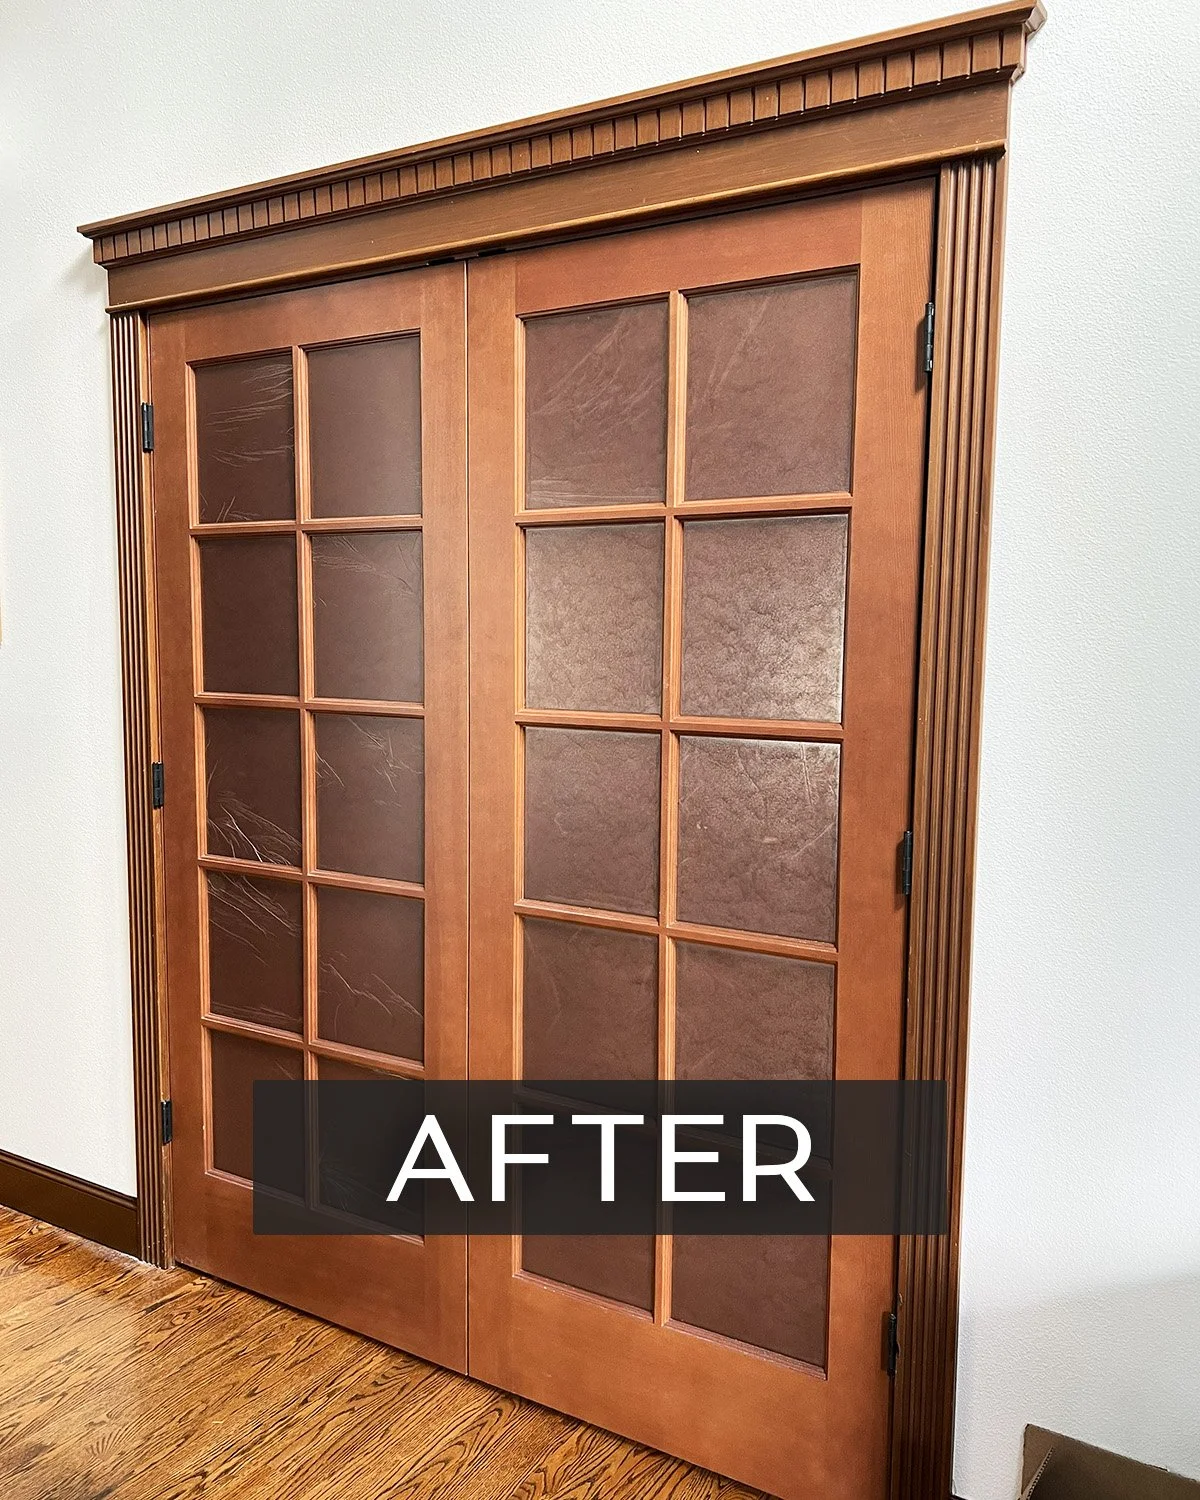
The old formal living room, once dark, heavy, and hardly used, now looks completely different, but still flows perfectly with the design of the entire house. This functioning home office is bright and beautiful with proper lighting and fresh White Dove paint throughout. The double glass doors are stained to match, and the hardware matches the existing doors. The client furnished the space with new Pottery Barn home office furniture, which provides drawers and cabinets to contain clutter, and best of all, to get her husband’s work off the kitchen counter!
What this project illustrates about remodeling
This project was a perfect example of what we explain to every client before we start: almost every remodel reveals something...the biggest questions are, what is the damage, and how much will this cost? The moment you open a wall or remove millwork, a cabinet, tile or anything from an older home, you often unveil unexpected (and expensive) surprises like structural issues, water damage, failed electrical or old plumbing. For this reason, we are reluctant to give firm estimates before we open walls. It's not evasiveness, we promise – it's just honesty, and it's the only fair way to set expectations.
If you're thinking about starting a remodel and want to understand more about how the estimating process works,our remodel guide covers what to expect before you commit to a project.
Construction surprises are the rule, not the exception
Older homes, even those built as recently as the 1990s and early 2000s, may have issues that don't surface until walls are open. Clients who understand this going in have a much better all-around experience with their contractor, who is ultimately there to fix the discovered issues!
Scope often grows once work begins, and that's okay
When surprise issues are discovered, the scope of work grows, the timeline extends and the budget expands. In the case of this home office, the structural correction was necessary to make sure the doors are solid, hung properly and will last for the life of the house.
Details (like millwork) matter more than people expect
Sierra Homes is very detail oriented. We make sure everything is done properly and no detail is missed. If the trim detail is not matching or even slightly off, we will notice that and fix it. Getting it right on this project required extra time and cost, and it was worth every bit of it in the end!
Frequently asked questions
Why can't contractors give exact remodel estimates upfront?
Until walls are opened, it's genuinely impossible to know what's behind them. Structural or framing issues, water damage, wood rot, electrical or plumbing problems, and code corrections are all common finds that may change the scope of a job. An experienced contractor can give a range and an honest set of conditions, but a firm fixed price before demo work is typically a sign that someone isn't being straight with you.
Can a formal living room be converted into a home office?
Yes, and it's a conversion that can make a real difference in how a home functions. Adding doors to an existing cased opening, updating lighting, and refreshing paint are all relatively contained changes that can transform an underused formal space into a room you actually want to work in.
How do you match existing millwork in an older home?
It requires locating the original profile, which may mean visiting specialty millwork yards or salvage suppliers with a sample piece in hand. Once the profile is identified, pieces can typically be custom-milled to match. It adds cost and lead time to a project, but a mismatched door casing will be noticeable for as long as you own the house, so it's usually the right call.
Is a living room-to-office conversion a good investment?
For homeowners who truly need dedicated workspace, this smart investment adds function to square footage that may otherwise go unused. Plus, a properly executed home office remodel, even with double doors added, can easily be converted back to a formal area for resale purposes. Glass doors in particular tend to read well to buyers because they allow light to move through the house rather than closing off a space completely.
Ready to rethink a space in your home?
Whether you have a room that isn't working for how you live now, or a design challenge that needs a fresh set of eyes, we'd love to talk through the possibilities.
Sammamish Entryway Remodel: Elevated Details
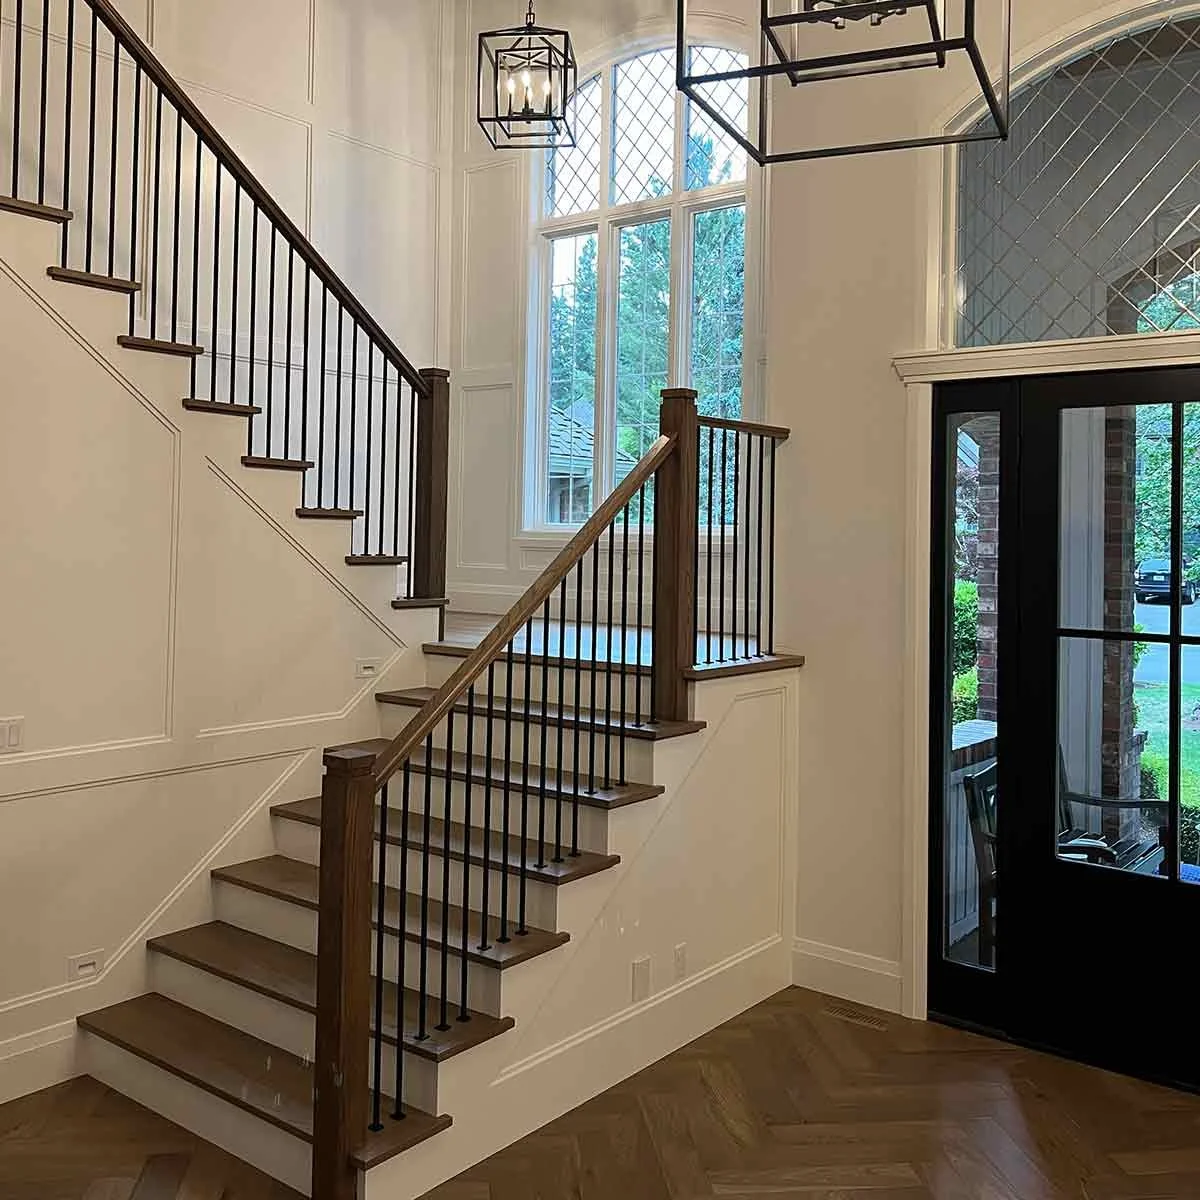
This entryway and staircase remodel shows how thoughtful material updates can completely refresh a space—without changing the layout. New railing, millwork, flooring, and paint brought a brighter, more refined feel to this high-traffic area of the Miller whole house remodel.
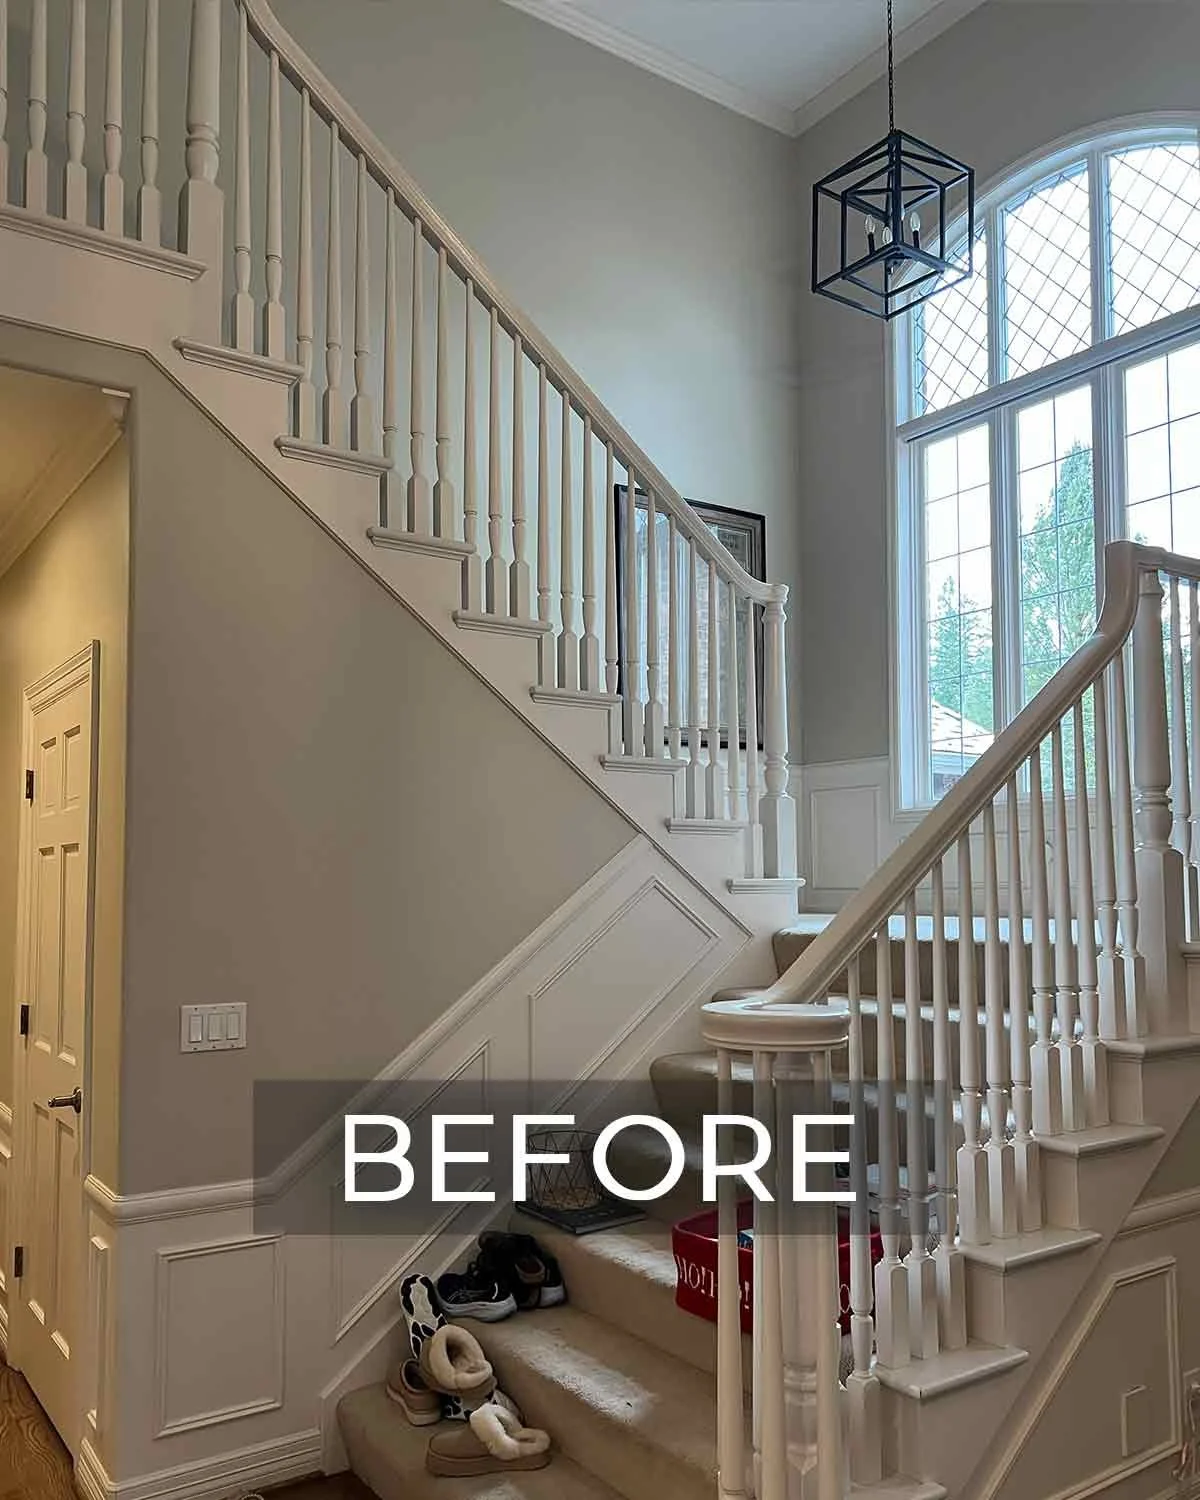
In our whole-house remodel of this 90s traditional home, the entryway and staircase received a focused refresh that proves you don’t need to change the layout to make a big impact. The existing footprint stayed exactly the same, but thoughtful updates to the railing, millwork, flooring, and paint completely transformed how the space feels.
Before the remodel, the entryway felt dated and a bit worn from daily use. By introducing a new stair railing, refined millwork details, updated flooring, and a fresh, cohesive paint palette, the space was brought back to life. These changes enhanced the natural light already present and gave the entry a cleaner, more intentional look without altering its original flow.
This project is a great reminder that high-traffic spaces benefit most from material and detail-driven updates. With the right design choices, an entryway can feel timeless, welcoming, and polished—while still honoring the home’s original layout.
Explore the gallery below to see the before and after photos of this entryway and staircase refresh!
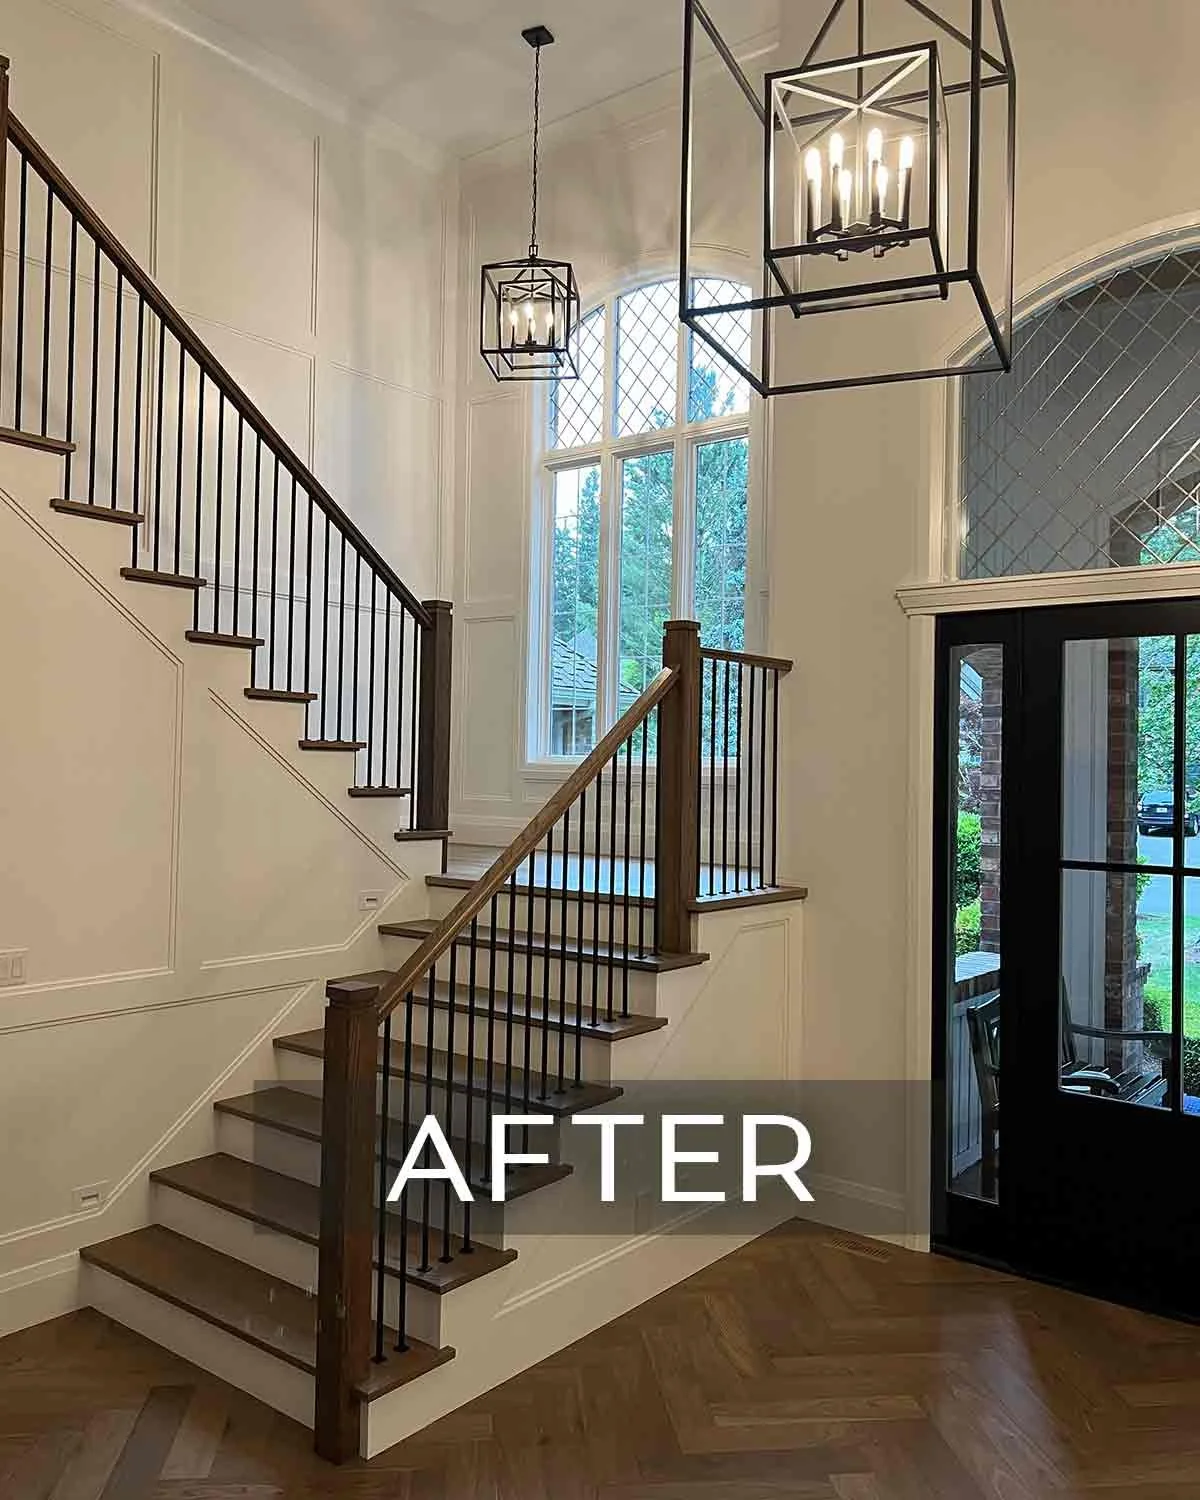
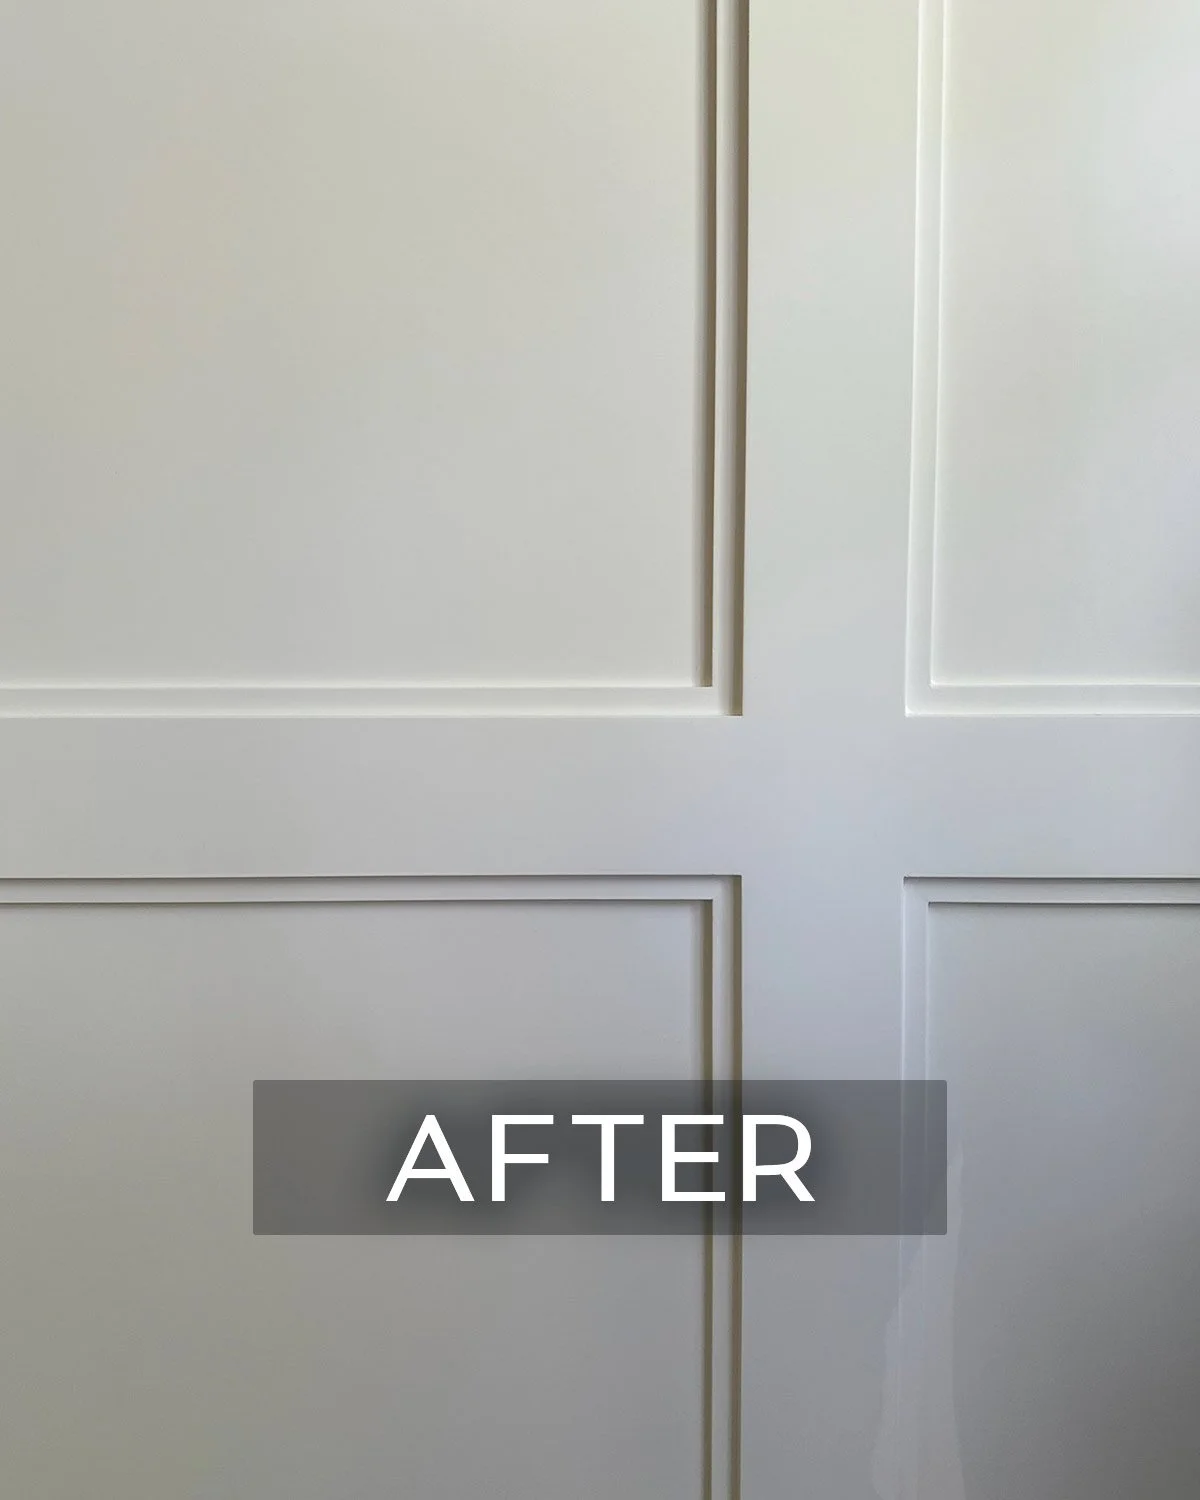
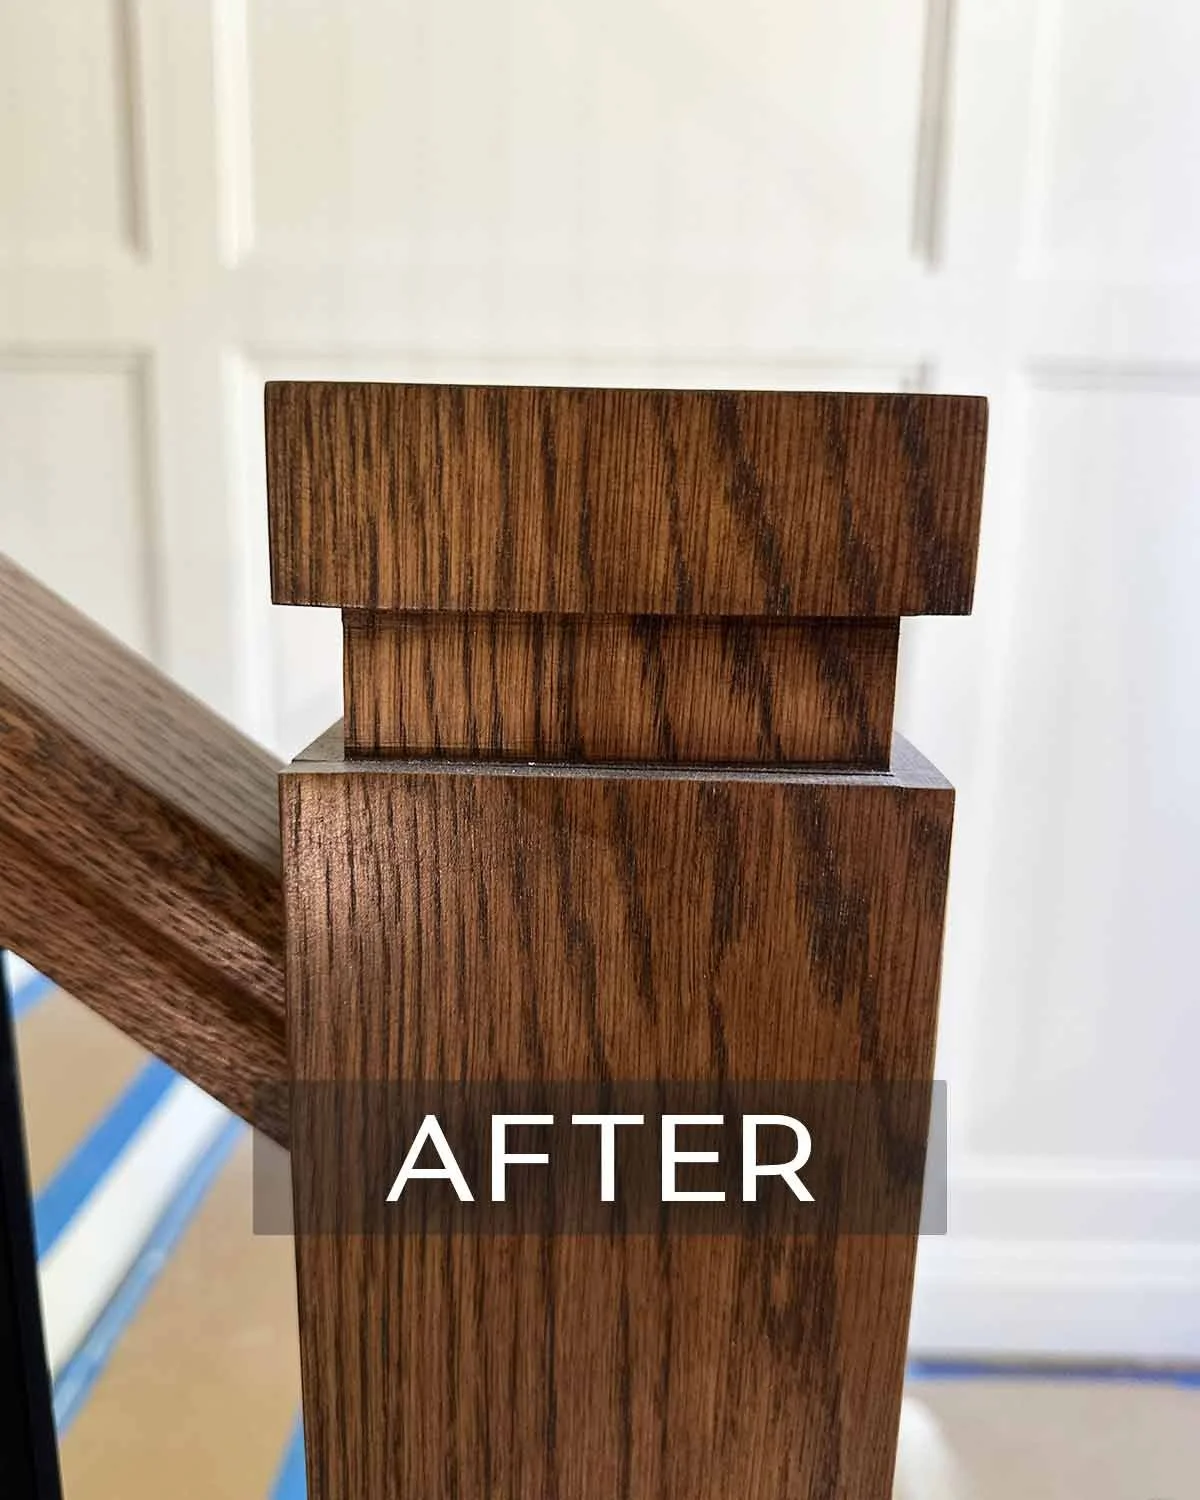
If you’re thinking about refreshing your own space, visit our Interior Design & Remodel Services page to learn how we can help you reimagine your home with craftsmanship and care.

Traditional 90s Living Room Remodel: A Fireplace-Centered Redesign
In this Miller home remodel, Sierra Homes reimagined the formal living room with fresh finishes and a custom-designed fireplace that now serves as the true focal point of the space. The result is a warm, inviting room that perfectly balances modern refinement with personal detail.
In our Miller home remodel in Sammamish, WA, the formal living room was ready for a refresh—and we loved helping this family bring it to life. With new flooring, fresh paint, and updated millwork, the space already felt brighter and more refined. But the true transformation came with the reimagined fireplace: custom-designed to showcase a favorite piece of art and serve as the heart of the room.
This remodel is a perfect example of how thoughtful design makes every detail feel intentional. By balancing clean lines with warmth and character, we created a space that feels elevated yet personal—one that reflects our clients’ style and the way they truly live in their home.
Explore the gallery below to see the before, during, and after photos of this transformation!


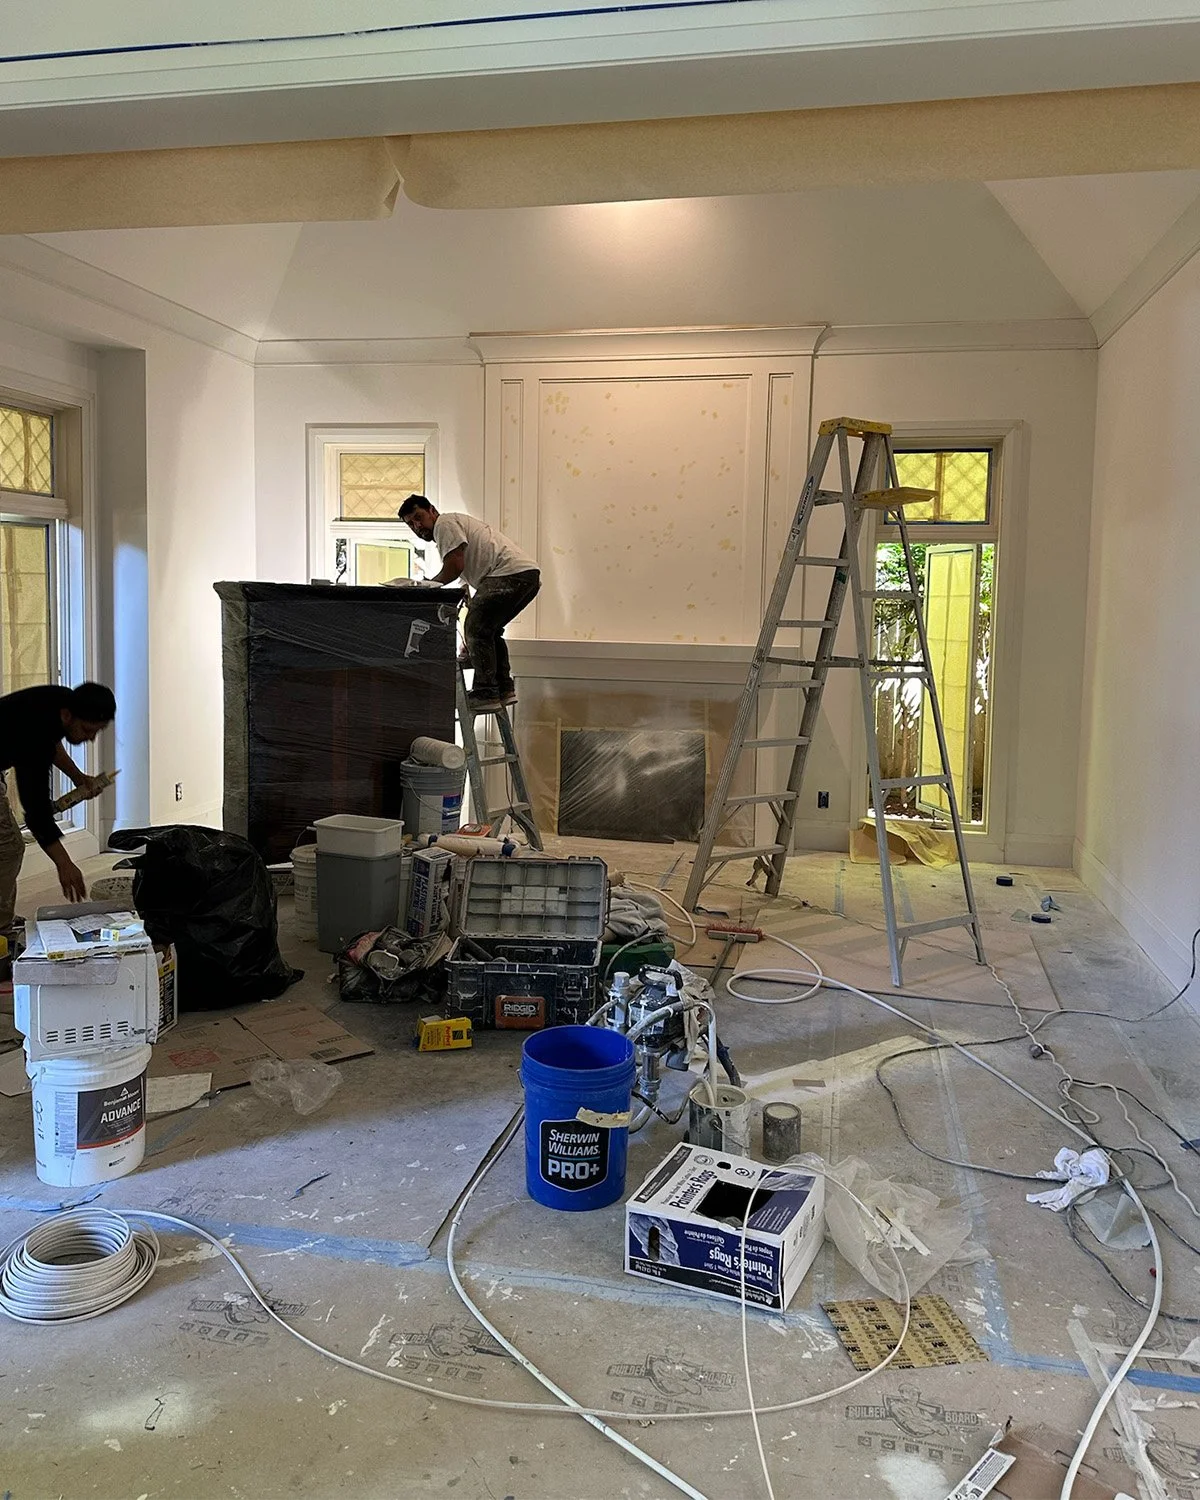


If you’re thinking about refreshing your own space, visit our Interior Design & Remodel Services page to learn how we can help you reimagine your home with craftsmanship and care.

Kennydale 1940's Remodel - Modern Farmhouse Bonus Room Transformation
Curious how we modernized this bonus room’s look while keeping the 1940’s charm? Check it out!
Thoughtful design challenge: Modernizing this bonus room’s look while keeping the 1940’s charm
Discover the careful process of updating old-fashioned charm with modern style! We transformed this 1940s bonus room in our Kennydale Modern Farmhouse Remodel by blending modern touches with its original appeal. From painting red bricks gray to adding an energy-efficient fireplace, updating millwork, and refinishing hardwood floors, see how old meets new seamlessly.
Kennydale, WA 1940's Remodel - Modern Farmhouse Bonus Room BEFORE


Looking to refresh an outdated space? Get in touch!

Sammamish Mid-Century Family & Office Remodel
See how we removed an outdated fireplace, created new spaces, and brightened a 1962 mid-century family room & office.
Thoughtful design challenge: Removing an outdated fireplace and creating two new rooms, while brightening and updating the space
This 1960s family room in Sammamish, WA was weighed down by dark, outdated elements and impeded flow. It needed an update that would:
Transform the space by creating two new rooms out of one large room.
Keep the aesthetic of the mid-century modern era in this 1962 home, which still had much of the original building materials and design elements.
Challenge accepted!
Design challenges:
Remove the outdated, oversized, black-painted stone fireplace that was dividing the room down the middle, blocking the flow of the space.
Brighten up the entire home by removing the brown stone floor and outdated dark hardwood and replace all with polished, modern tile.
Bring in more natural light by adding windows and create a large glass wall and glass door leading out to indoor pool area.
Create two rooms, one for a functional office space that also serves as a guest bedroom and another large family room for TV and modern fireplace.


Looking to refresh an outdated space? Get in touch!

Sammamish 1990s Kitchen Remodel
Explore how we transformed a worn 1990s Sammamish kitchen with a fresh layout, painted cabinets, updated appliances, champagne bronze finishes, and functional storage solutions.
Thoughtful design challenge: Revamping a dated 90s kitchen with new layout, appliances, and style
This 1990s kitchen in Sammamish, WA was outdated with worn, broken cabinets, a built-in microwave/oven combo that no longer worked, and a leaking dishwasher.
Time for a complete makeover!
Design challenges:
Create a cabinet layout with a new 36” range into a corner/diagonal wall.
Bring in color by using a trending painted cabinet style.
Match existing hardwood floors and install all new on the entire main level.
Replace all appliances with new, top of the line, coordinating pieces.
Design a pantry cabinet with roll-outs for maximum storage.
Update plumbing fixtures, lighting, and cabinet hardware with champagne bronze
Freshen up quartz with bright, white color with gold veining.
Rebuild fireplace surround and add floating shelves to the family room.

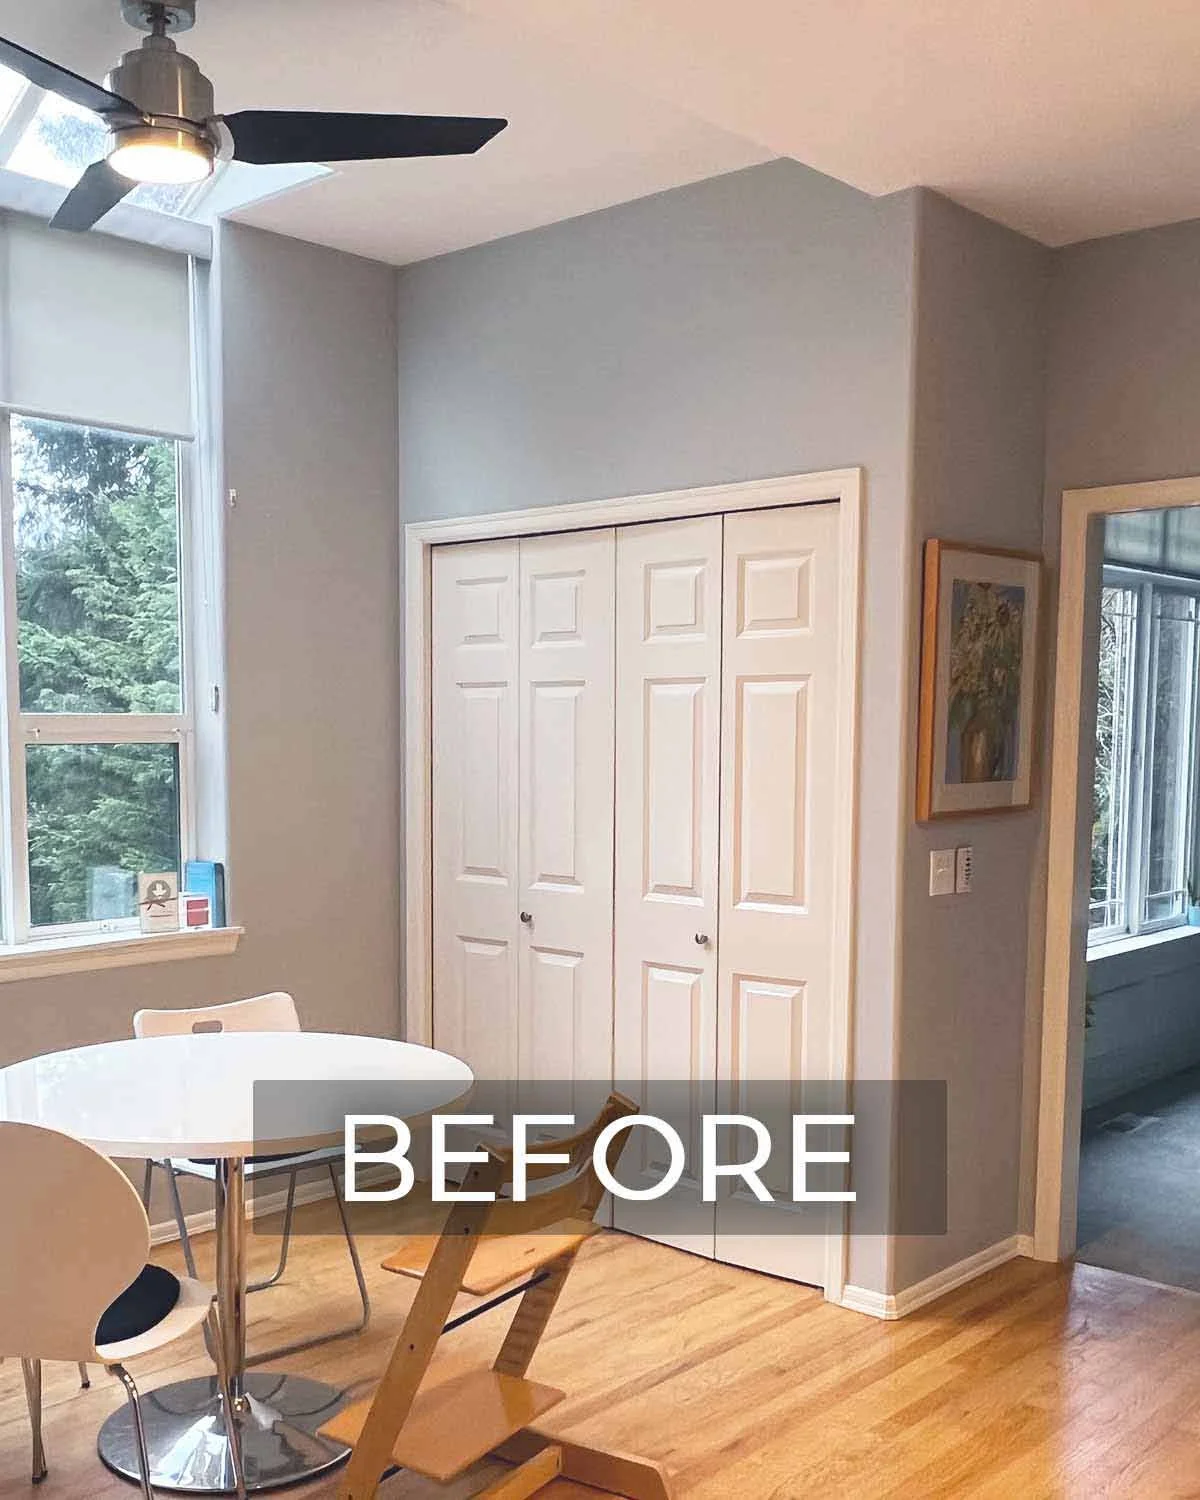


Have an interior design challenge or remodel project? Reach out for help!

Kennydale 1940's Remodel - Modern Farmhouse Kitchen Transformation
Take a look at how we created a more functional, open, and bright space in this 1940’s kitchen.
Thoughtful design challenge: Creating a more functional, open, and bright space in this 1940’s kitchen
Consider the challenges of the outdated 1940’s kitchen in our Kennydale modern farmhouse remodel and witness the incredible transformation!
Design challenges:
We conquered the small, closed-in feel by raising the ceiling and moving a wall.
We tackled the non-functional layout with no storage by redesigning, moving appliances, and creating a pantry/buffet.
We banished the dark, heavy setting with natural oak floors, white cabinets, more lights, and a larger kitchen window.
The result? A fresh, virtually unrecognizable space!
Kennydale 1940's Remodel - Modern Farmhouse Kitchen BEFORE


Looking to refresh an outdated space? Get in touch!

Issaquah 1950s Kitchen & Den Remodel
Explore how we opened up a 1950s Issaquah, WA kitchen and den, navigating load-bearing walls and plumbing to create a bright, open-concept space with an eating bar.
Thoughtful design challenge: Opening up a 1950s kitchen & den while factoring in load-bearing walls & piping
The owners of this 1950s home wanted to update their kitchen and den to create an open concept feel by removing an old wall that was dividing and closing off the two rooms.
Design challenges:
Once demolition began, there were surprises found inside the dividing wall that would pose a challenge moving forward. Part of the wall was load bearing and another part held old drain pipes coming down from an upstairs bathroom, none of which could be removed.
Challenge accepted! We worked around the problem areas, removing as much of the wall as possible, which really opened up the space to the new kitchen, bringing in more light and even provided a large eating bar and work area.
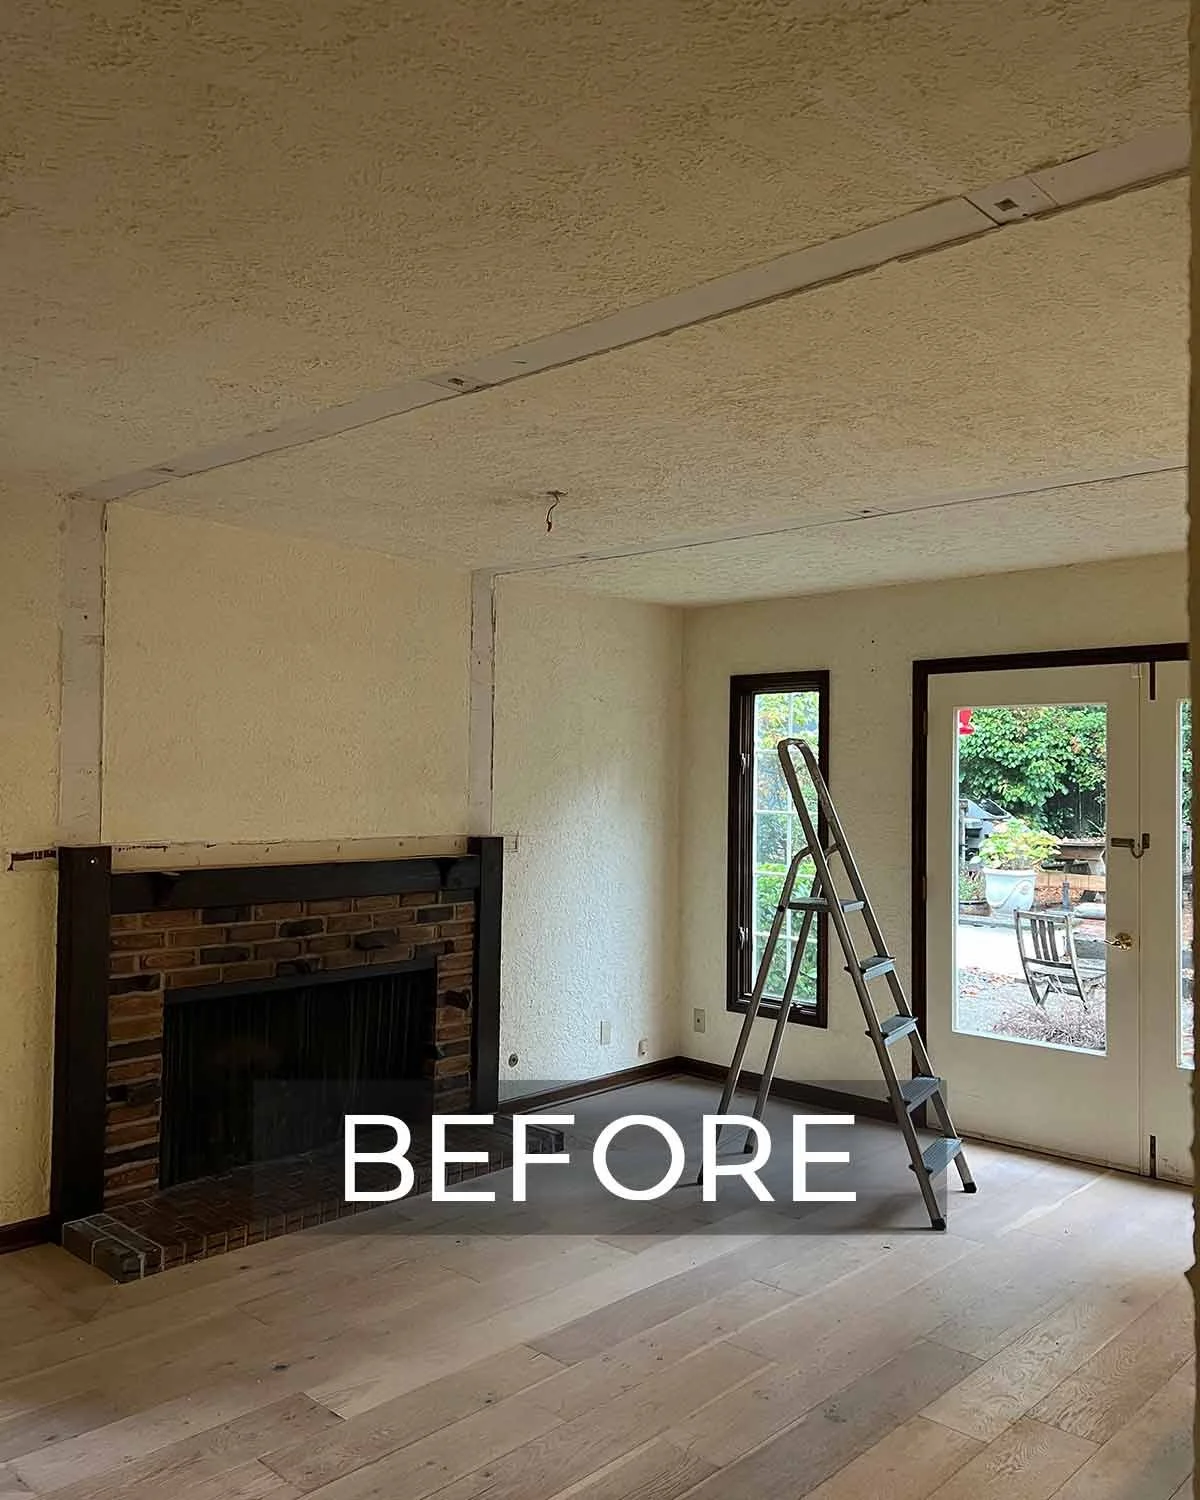


Ready to transform your living space? Reach out!

Maple Valley Bathroom Remodel
See how we refreshed an outdated Maple Valley bathroom with smart design, featuring a walk-in shower, separate vanities, and skylight-friendly solutions.
Thoughtful design challenge: Refreshing this outdated bathroom while accommodating the skylights
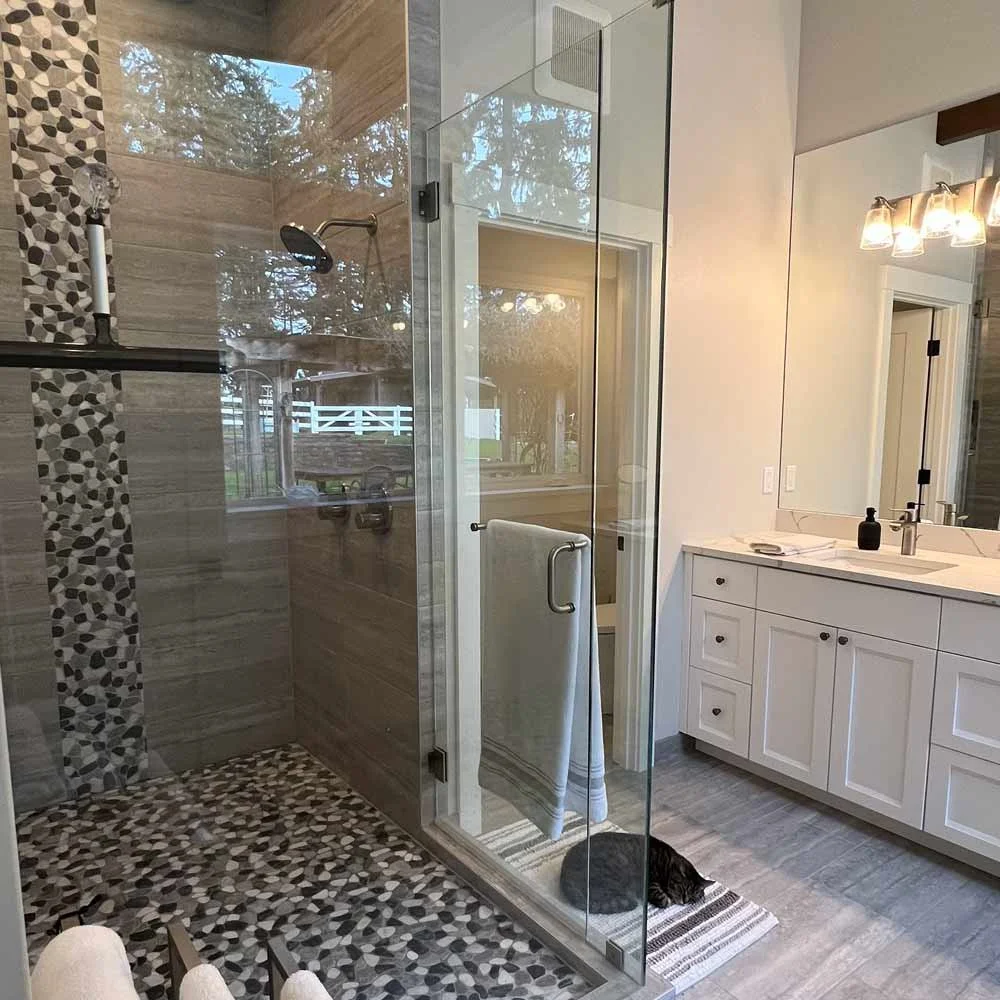
A lovely, retired couple in Maple Valley, WA had been in their home since the 1980s and had gotten used to living with the outdated bathroom, which was ready for a much-needed refresh! There was a step-down sunken tub, wall-to-wall carpet (yes - in the bathroom), wallpaper peeling off the wall, and all the popular mauve colors of the time.
When I first walked in, I noticed the skylights throughout the ceiling and knew that would be the biggest challenge in coming up with the design plan. After several concept drawings, we settled on a design that eliminated the bathtub altogether, created a walk-in shower in the corner, closed in the toilet room, separated the vanities, and made a larger walk-in closet along the back wall. The happy customers are now ready to update the rest of the house!


Have an interior design challenge or remodel project? Reach out for help!
How To Update An Older Home While Keeping Its Charm
While it may be tempting to completely gut an old house and fill it with all that’s trendy and new, keeping the home true to the era in which it was built will help preserve its charm.
While it may be tempting to completely gut an old house and fill it with all that’s trendy and new, keeping the home true to the era in which it was built will help preserve its charm. Before beginning any renovations, research the styles of the time period to determine what historical features should be kept and which could be updated.
For example, the design elements for a mid-century modern home built in the 1960s to 1970s will differ significantly from those found in a 1930s to 1940s art deco style home. And all the styles of decades past are completely different than the contemporary look of today’s modern homes.
With all the various styles and time periods to consider, design selection can be difficult and overwhelming when renovating. But with many of the “vintage” looks trending today, one can easily find new, similar pieces needed to complete the look. Done properly, you will have the charming look of an old home mixed with new home luxury!
We just completed a design project for a client with a 1960's mid-century modern home who needed new hard surface selections (the original designer hadn't kept with the true aesthetic of the home and took her way over budget). In keeping with the roots of the home, the exterior stone, wood beams, stone entryway, and some wood cabinets would remain in place while other updated surfaces would be added to enhance the original look.

These countertops and tile elements complemented the roots of the home beautifully
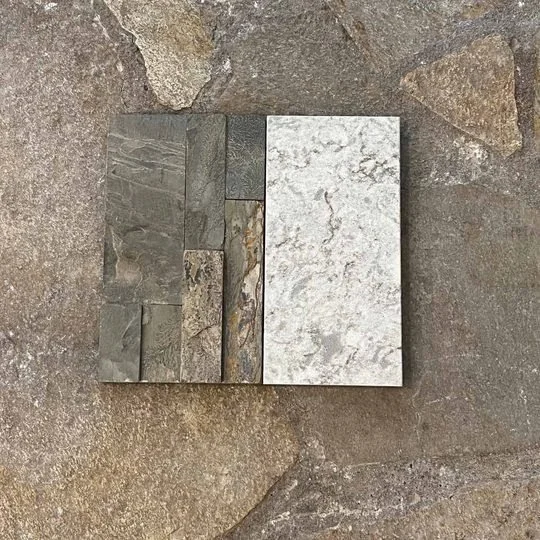
We found hard surfaces to match the stone entryway flooring
The result was a timeless masterpiece of genuine mid-century design mixed with modern pieces that update the space in every room. And we saved her over $23,000!

Issaquah Modern Ranch House Fireplace Update
See how thoughtful design transformed bulky, soot-stained fireplaces into sleek, gas-powered features, opening up a 1960s Issaquah ranch home for a brighter, modern look.
Thoughtful design challenge: Reworking the fireplaces to open up & brighten this living room and kitchen
The fireplace in this 1960s Issaquah, WA ranch home was the bulk of the space, taking up most of the room and closing off the kitchen from the living room. To make the fireplace smaller and open things up, the bookshelf on the end was removed, and part of the bricks on the kitchen side were taken out to create a built-in pantry for extra storage.
Before the remodel, the fireplaces were wood burning and the bricks were stained with soot. The homeowners wanted gas fireplaces for the ease of lighting with the flip of a switch and for the cleaner burn of gas. Gas inserts were installed and instantly: updated fireplaces! We installed shiplap above the fireplaces, and had a fun DIY day scrubbing and white washing the bricks for a clean and transformed look.


Have an interior design challenge or remodel project? Reach out for help!

Outdoor Space Transformation
A Des Moines home with a stunning water view across Puget Sound posed a recent outdoor living space challenge.
A Des Moines home with a stunning water view across Puget Sound posed a recent outdoor living space challenge. The old stairs leading to the front door and small deck porch were made of wood, which was rotting due to the salty fog that is common in the area. The homeowners had a very small backyard with no grass and complained of mud all winter, making it difficult to enjoy the space or even let the dog out.
The solution was to build new stairs, a new porch and a wrap-around deck all made of a composite material which will not rot. TimberTech decking is engineered to resist weather, comes in many different colors to resemble wood and lasts much longer than real wood.
Stairs were replaced with composite TimberTech material to protect against the elements.
The happy clients use their backyard all the time now! We created an outdoor living area complete with a pergola, flower planter, furniture and fire pit. And the dog can go out without tracking in mud!